Using Neosync with any LLM
Introduction
This guide walks through how you can integrate Neosync with any LLM or machine learning model that has a REST endpoint. We're going to use the use case that we have a customer interview platform that we want to generate synthetic data for our staging and development environments. Because the production customer interview data is sensitive, generating synthetic data is a secure and privacy-safe way of giving developers the data they need to build new features without compromising on data privacy.
Pre-requisites
In order to get started, you'll need the following:
- A Neosync account which you can sign up for free here
- Access to an LLM hosted at an endpoint. I'll be using OpenAI but you can use any other LLM as long as it's available at a REST endpoint.
- A database to store your data. I'm going to use Neon but either Postgres or Mysql works.
Setting up our database
For this guide, I'm going to use a Postgres database from Neon.
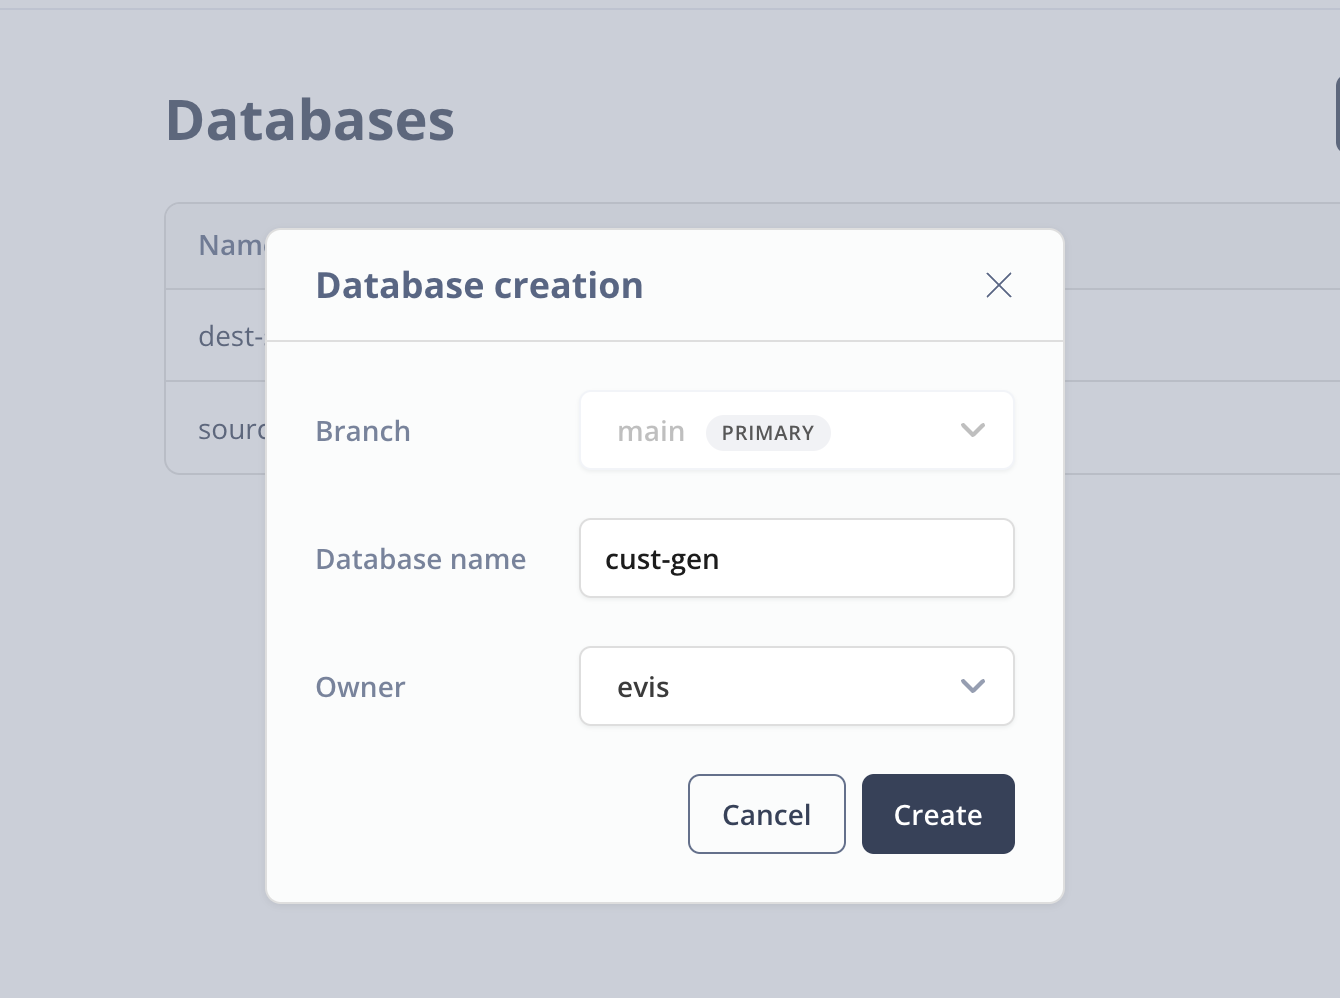
Click on Databases on the left hand menu and click on the New Database button to create a new database. I've named my database cust-gen and picked the evis role as the owner. This is just an admin role that I'm using for this demo.
Next go to the SQL Editor in Neon and let's create our database schema. First, make sure that you have the cust-gen database selected and then paste the following SQL into the editor window and click Run.
CREATE TABLE candidates (
    id UUID PRIMARY KEY,
    first_name VARCHAR(255),
    last_name VARCHAR(255),
    email VARCHAR(255) UNIQUE,
    interview text
);
When the query successfully runs, you should see the following:
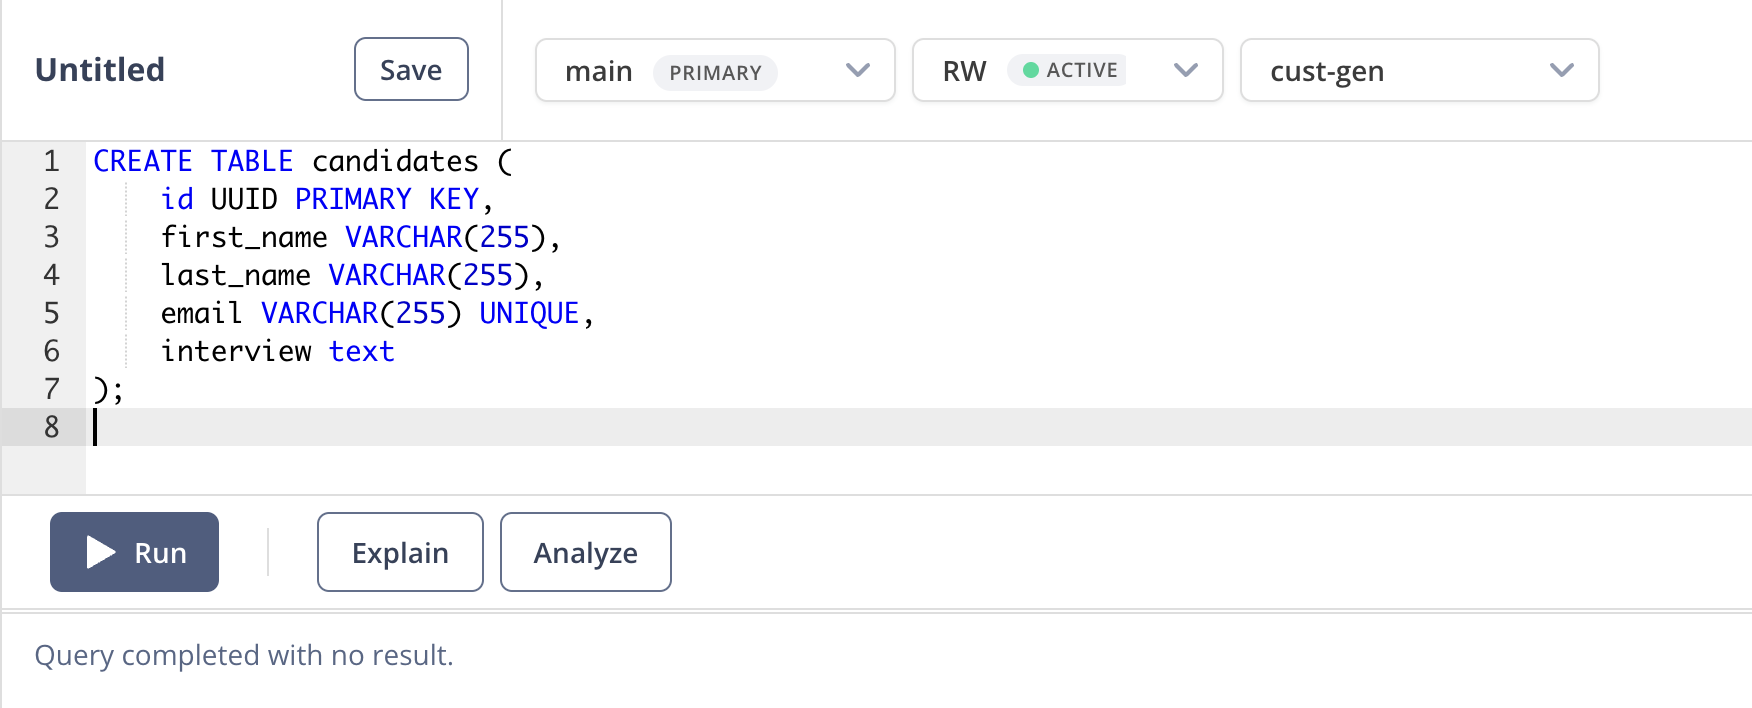
Nice! DB set up is complete.
Last thing we'll need to do is to just get the connection URL that we'll use to connect to our database. Go to Dashboard and select the cust-gen DB and click on the copy button to copy the connection URL.
Hang on to this for a minute and we can move onto setting up Neosync.
Creating a Connection
Now that we have our database set up, we can connect Neosync to it.
To get started here, login to your Neosync account and click on Connections -> + New Connection -> Neon.
Let's name our connection cust-gen-db and then in the Connection URL field, paste in the connection string we copied earlier. Click on Test Connection to see validate your connection. You should see a modal pop up like so:
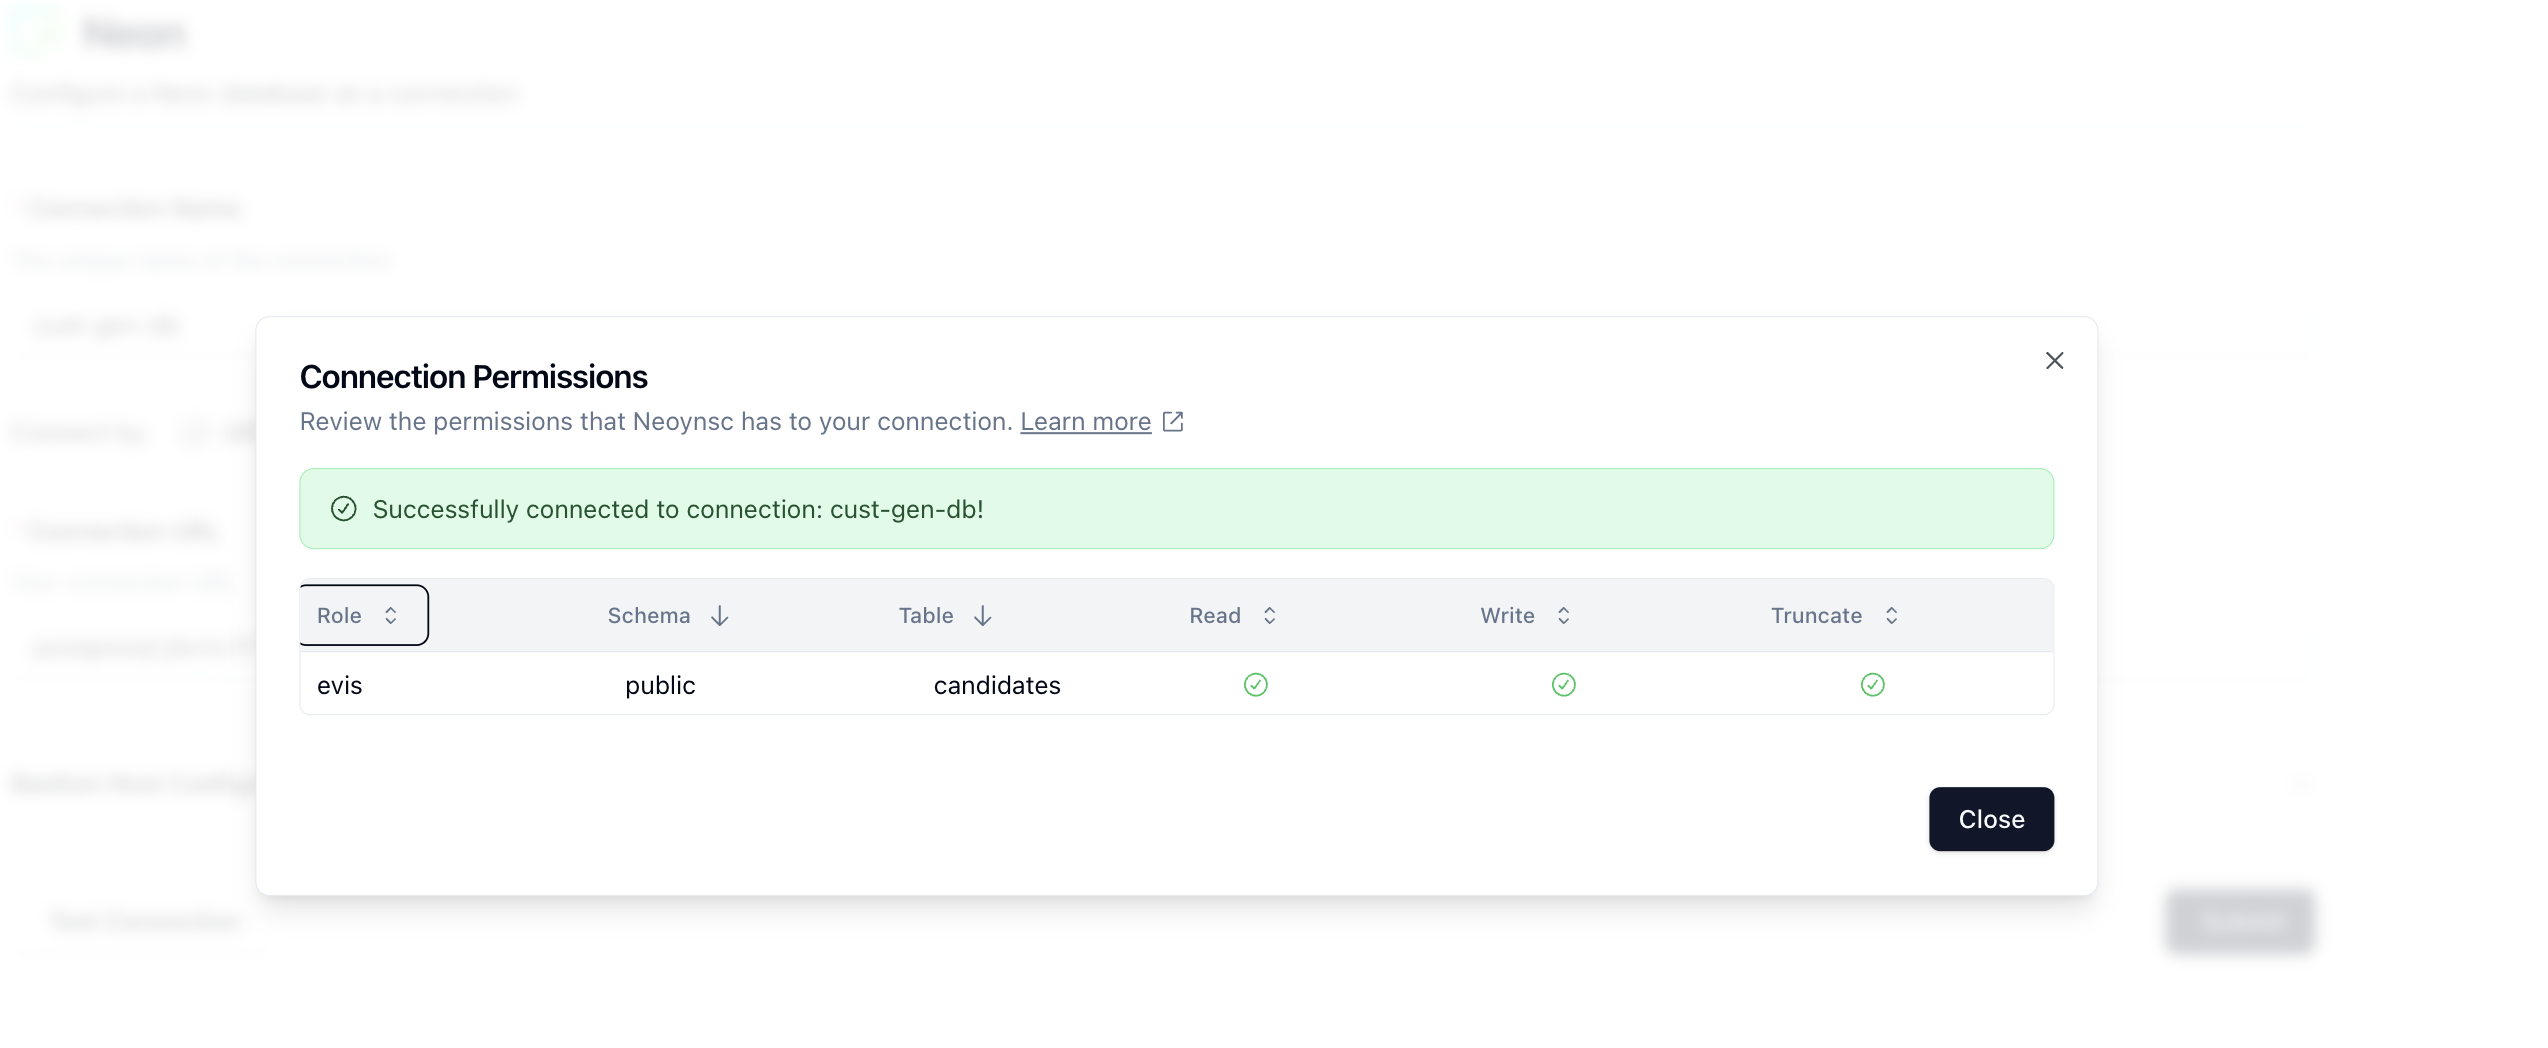
Nice! Looks like we can see our database and table and that our permissions are correct. Click on Close and then Submit to save the connection.
Creating a Custom Transformer
Neosync has the notion of Transformers. Transformers are modules that can generate synthetic data or anonymize existing data. We ship Neosync with 40+ transformers out of the box but you can also create your own custom transformers in code which is what we're going to do for this use case.
Click on Transformers in the top navigation menu and then the + New Transformer button.

You'll then be redirected to the Create a New Transformer page. In the Source Transformer dropdown, select the Generate Javascript transformer. Once you do that, you'll see the rest of the form fill in like the screenshot below:
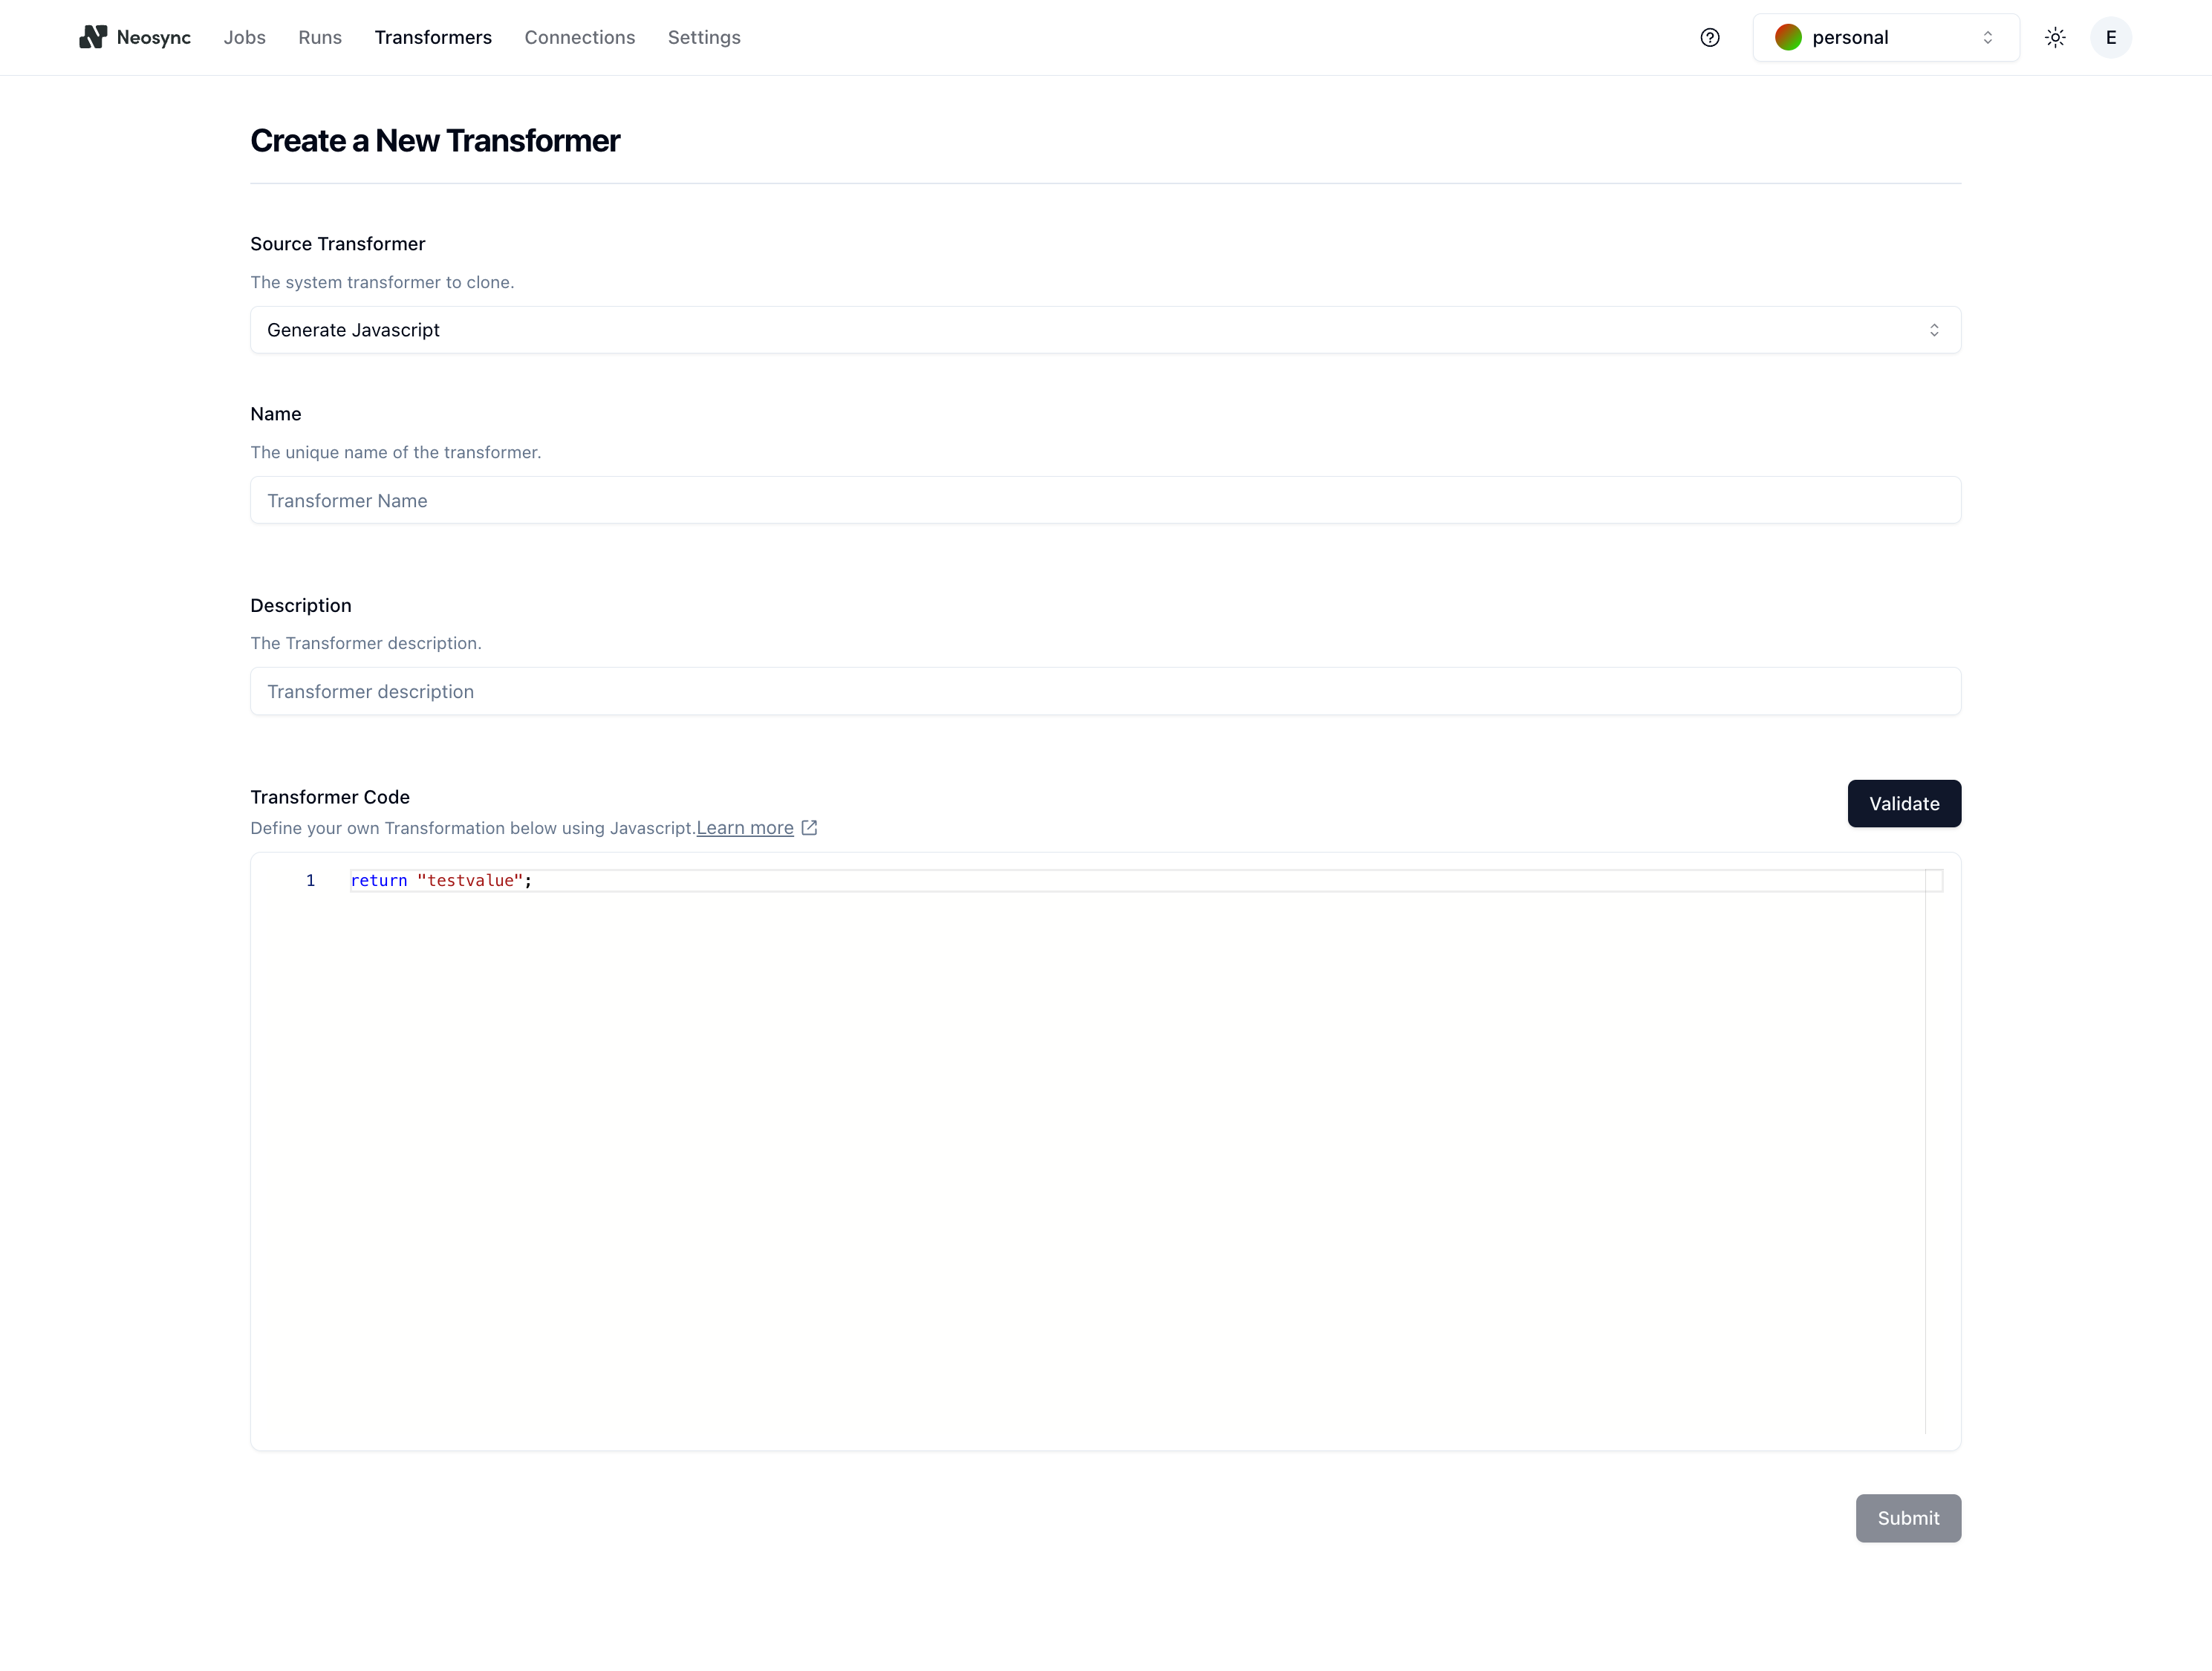
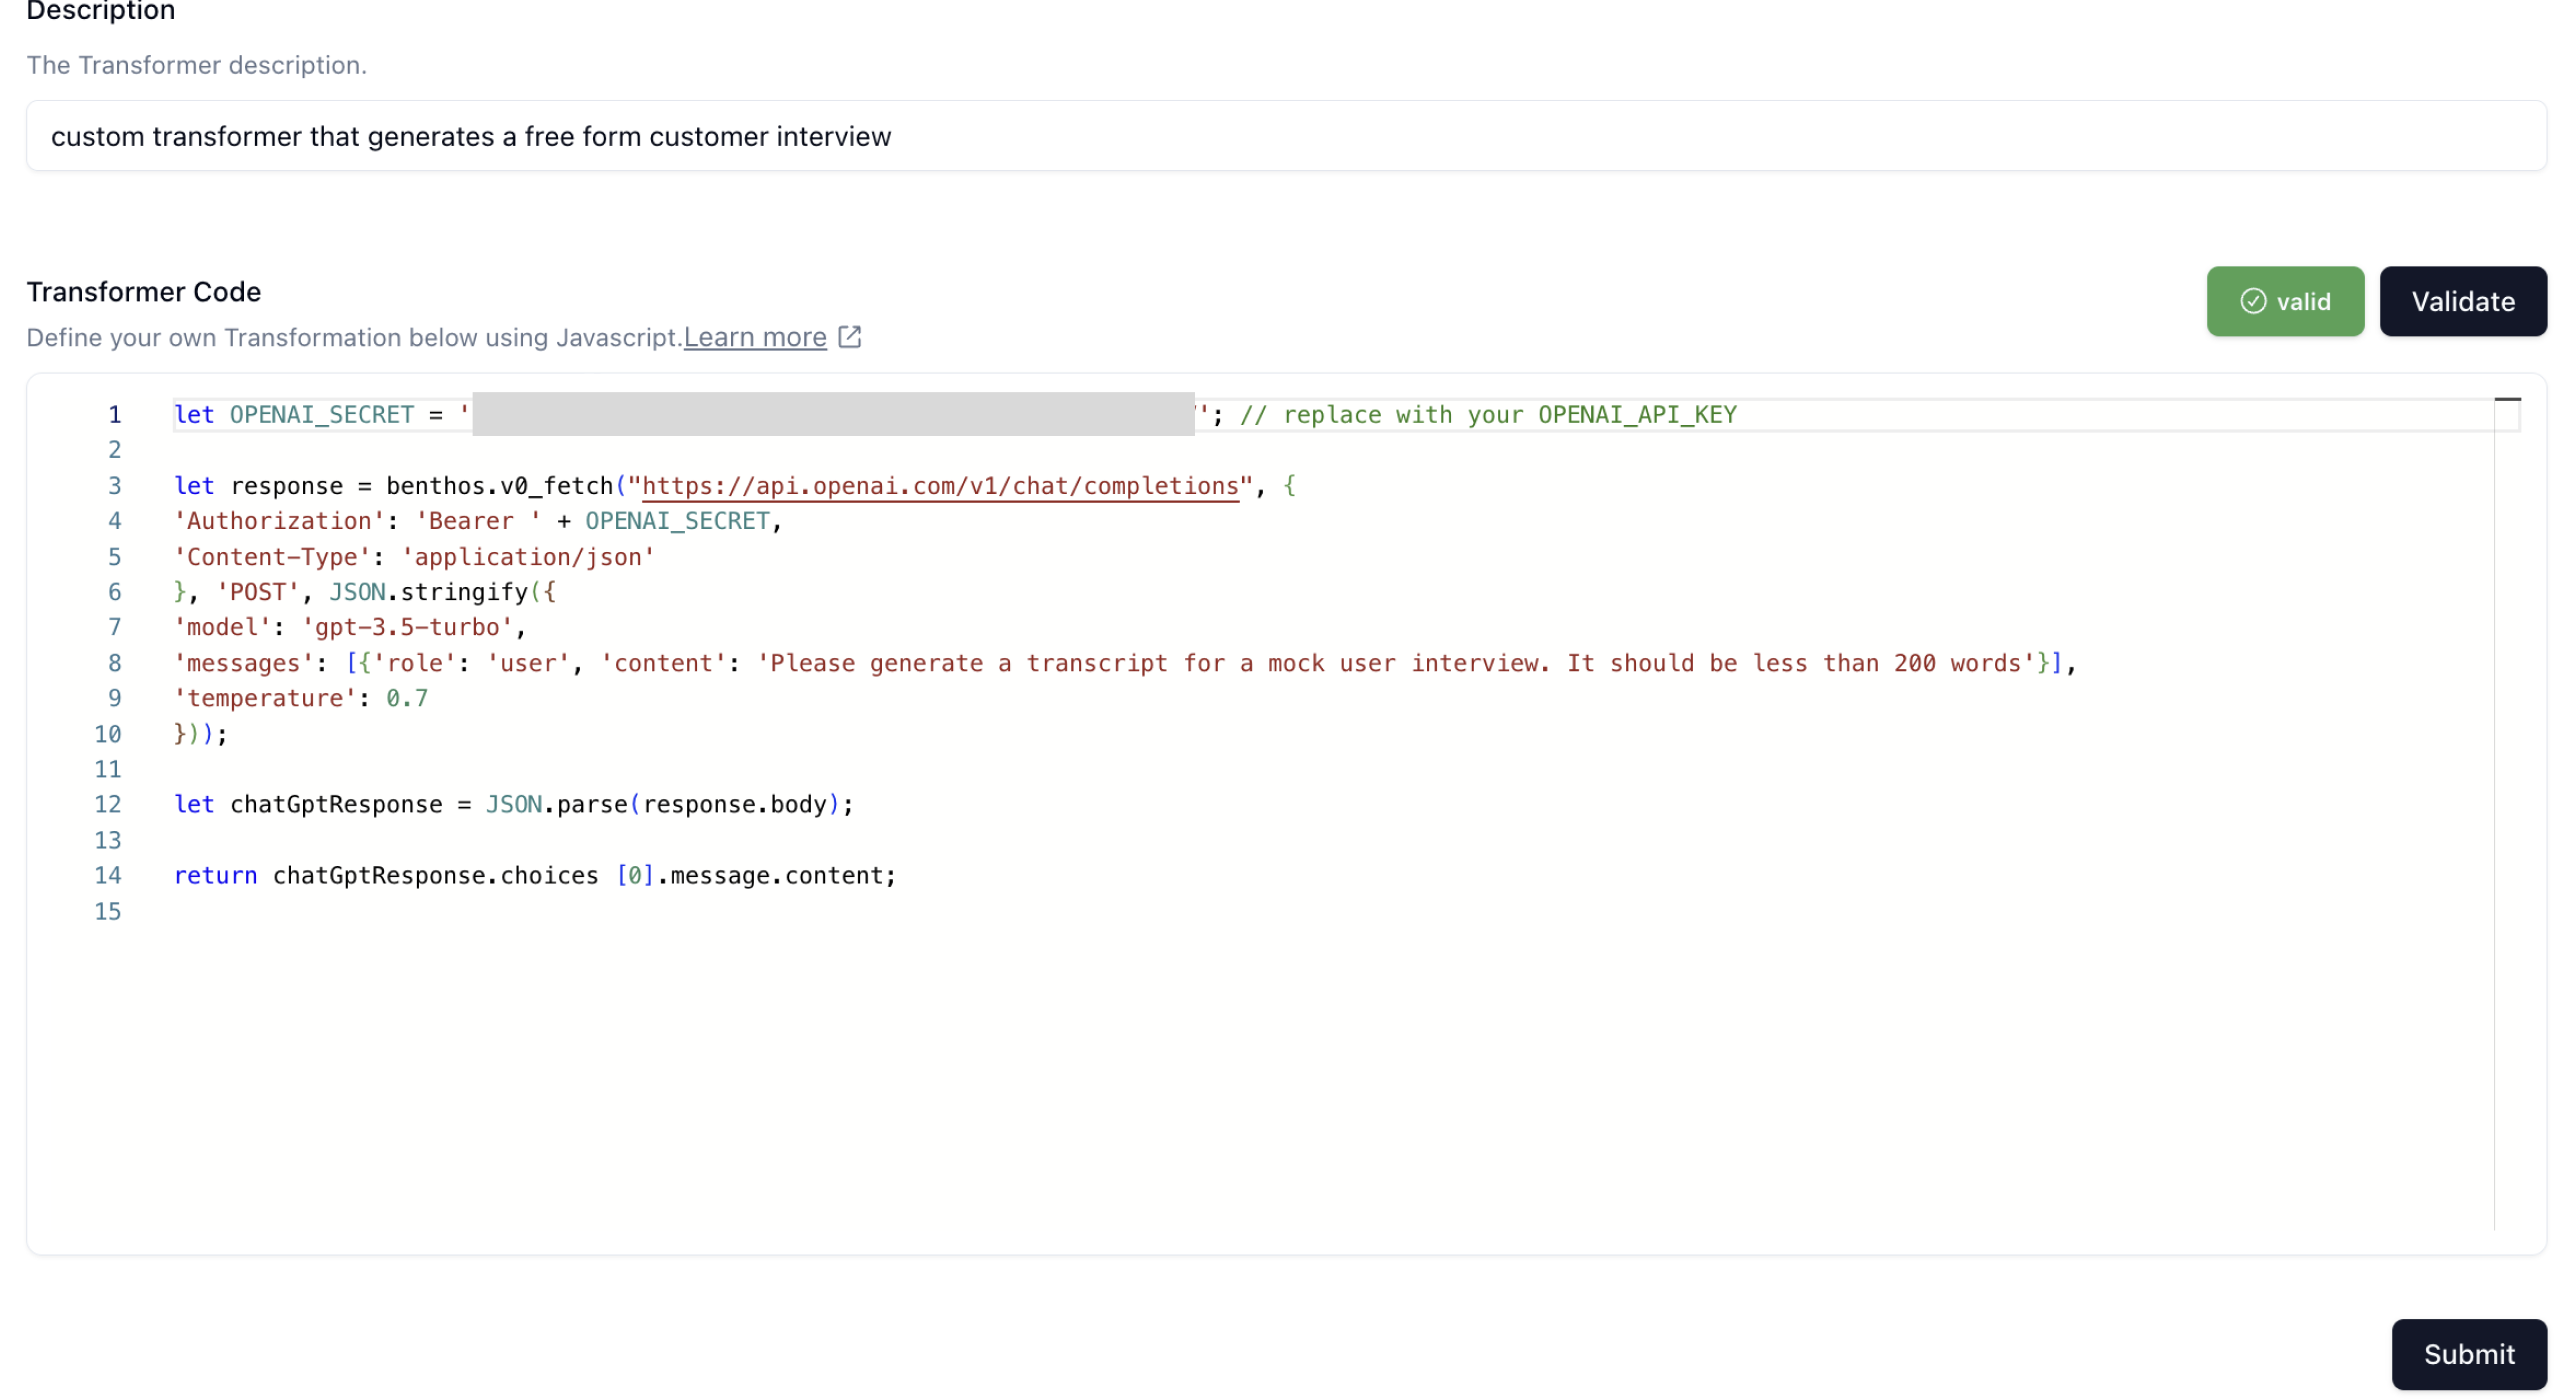
Next, give your transformer a name and a description. For this guide, we'll name the Transformer gen-cust-interview and the description can be custom transformer that generates a free form customer interview.
In the Transformer Code section, we can write our custom Javascript transformer that calls OpenAI (or any other model that is served over an endpoint).
Here is the code snippet that I'm using:
let OPENAI_SECRET = 'xxxxxx'; // replace with your OPENAI_API_KEY

let response = benthos.v0_fetch(
  'https://api.openai.com/v1/chat/completions',
  {
    Authorization: 'Bearer ' + OPENAI_SECRET,
    'Content-Type': 'application/json',
  },
  'POST',
  JSON.stringify({
    model: 'gpt-3.5-turbo',
    messages: [
      {
        role: 'user',
        content:
          'Please generate a transcript for a mock user interview. It should be less than 200 words',
      },
    ],
    temperature: 0.7,
  })
);

let chatGptResponse = JSON.parse(response.body);

return chatGptResponse.choices[0].message.content;
Note that if you decide to use a different endpoint, you just have to wrap it in benthos.v0_fetch() like the example above since we use benthos under the covers to execute the HTTP request. You can copy and paste this code snippet into the Transformer Code section and then click on Validate to validate that the code will run. You should see the following:
Next, click on Submit and let's move onto the final step.
Creating a Job
Jobs are how we configure and execute workflows to run and generate data or anonymize existing data. Click on Jobs in the top navigation menu and then click on the + New Job button. Select the Data Generation job type and click Next.
You'll land on the Define page where we can start to define our job.
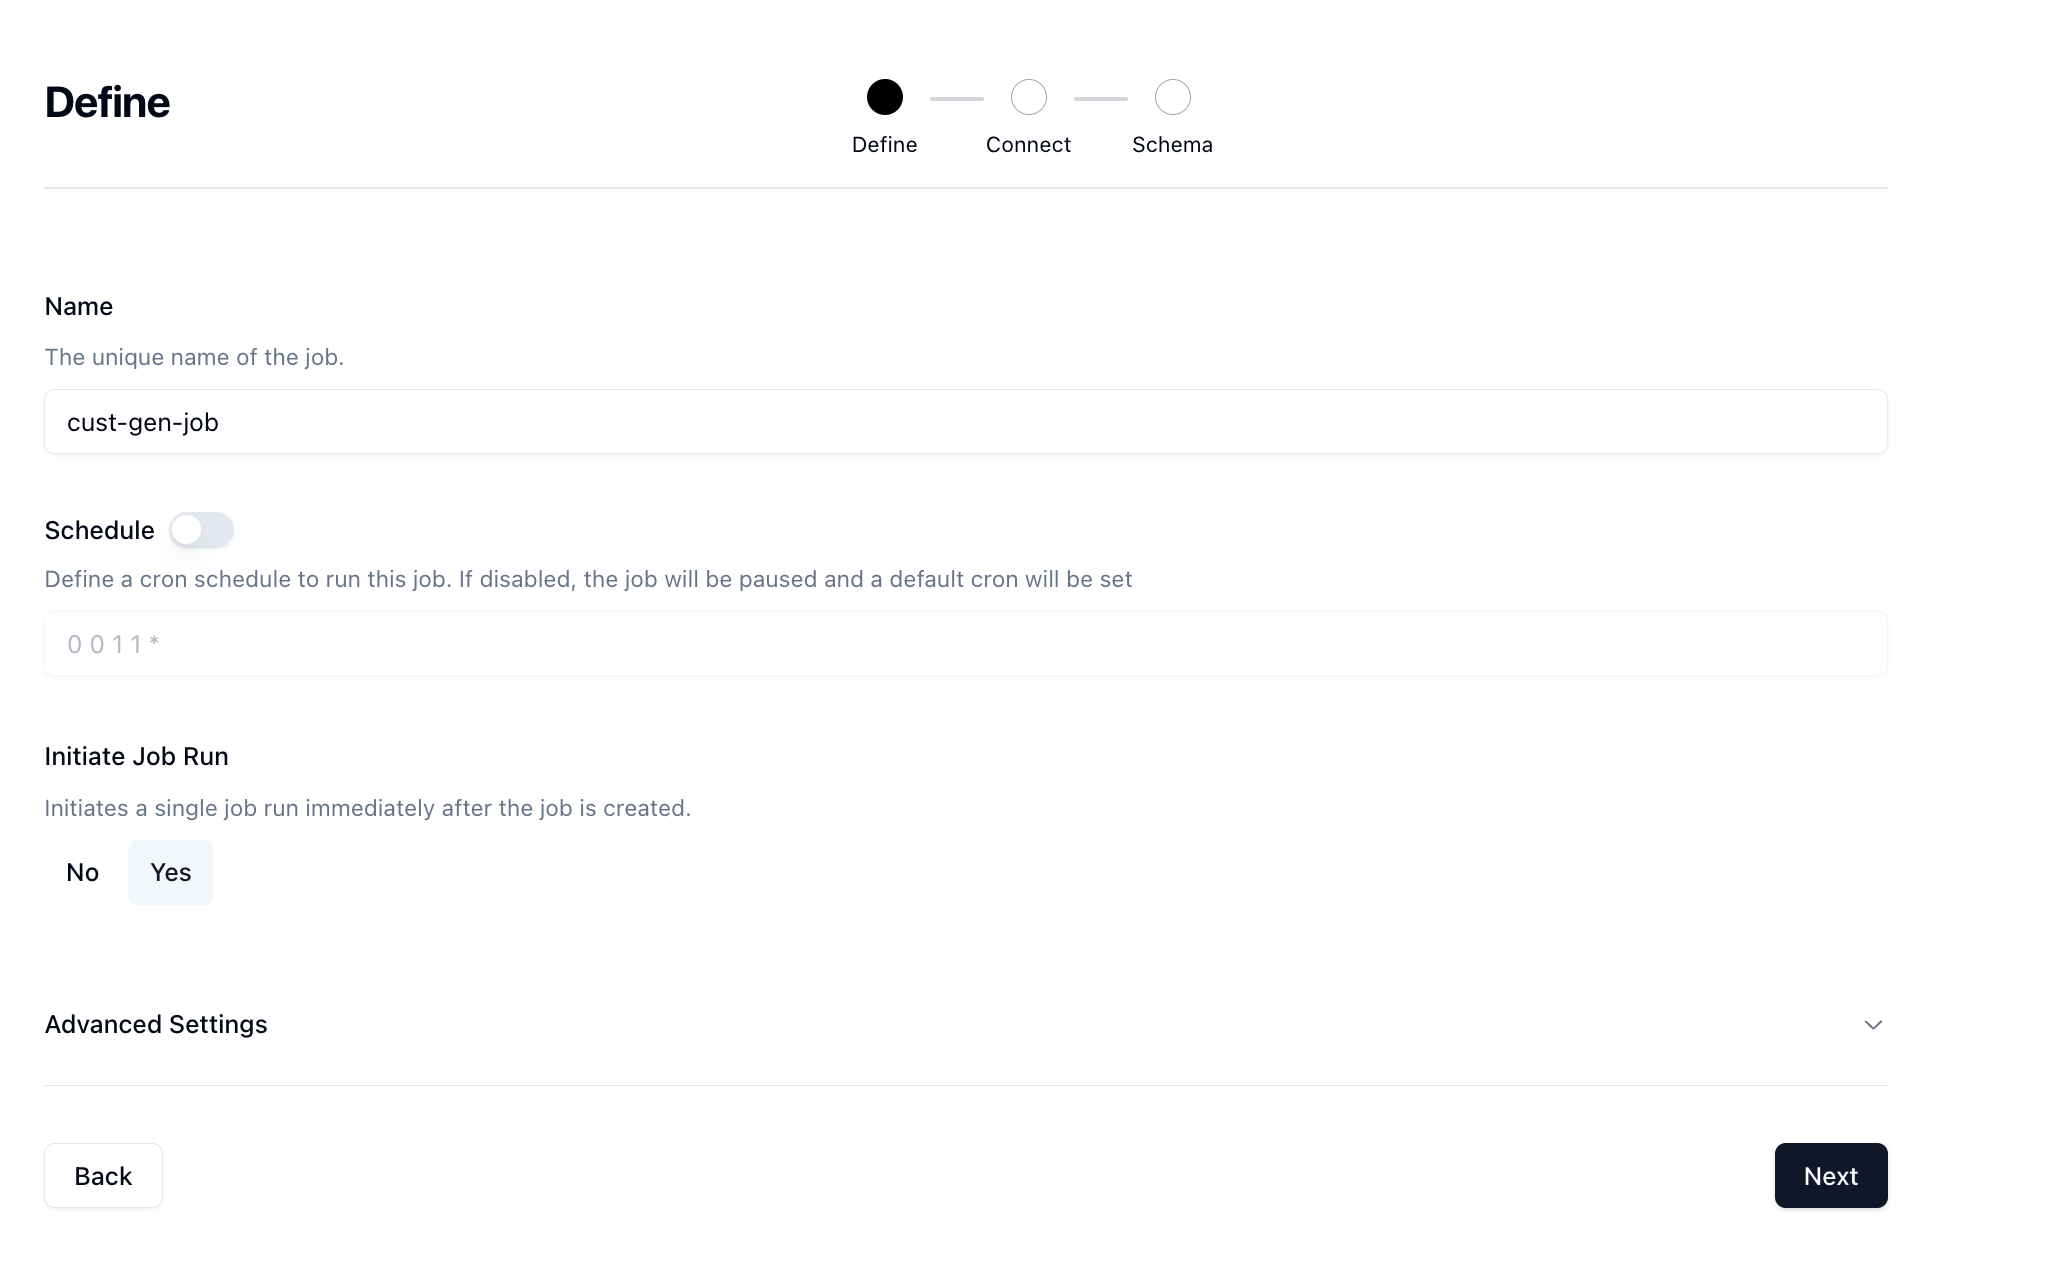
Give your job a name and then if you want to run it on a schedule you can, however we're just going to manually trigger. Set the Initiate Job Run option to Yes and then click Next.
Next, you'll be taken to the Connect page where you can select the connection we previously created.
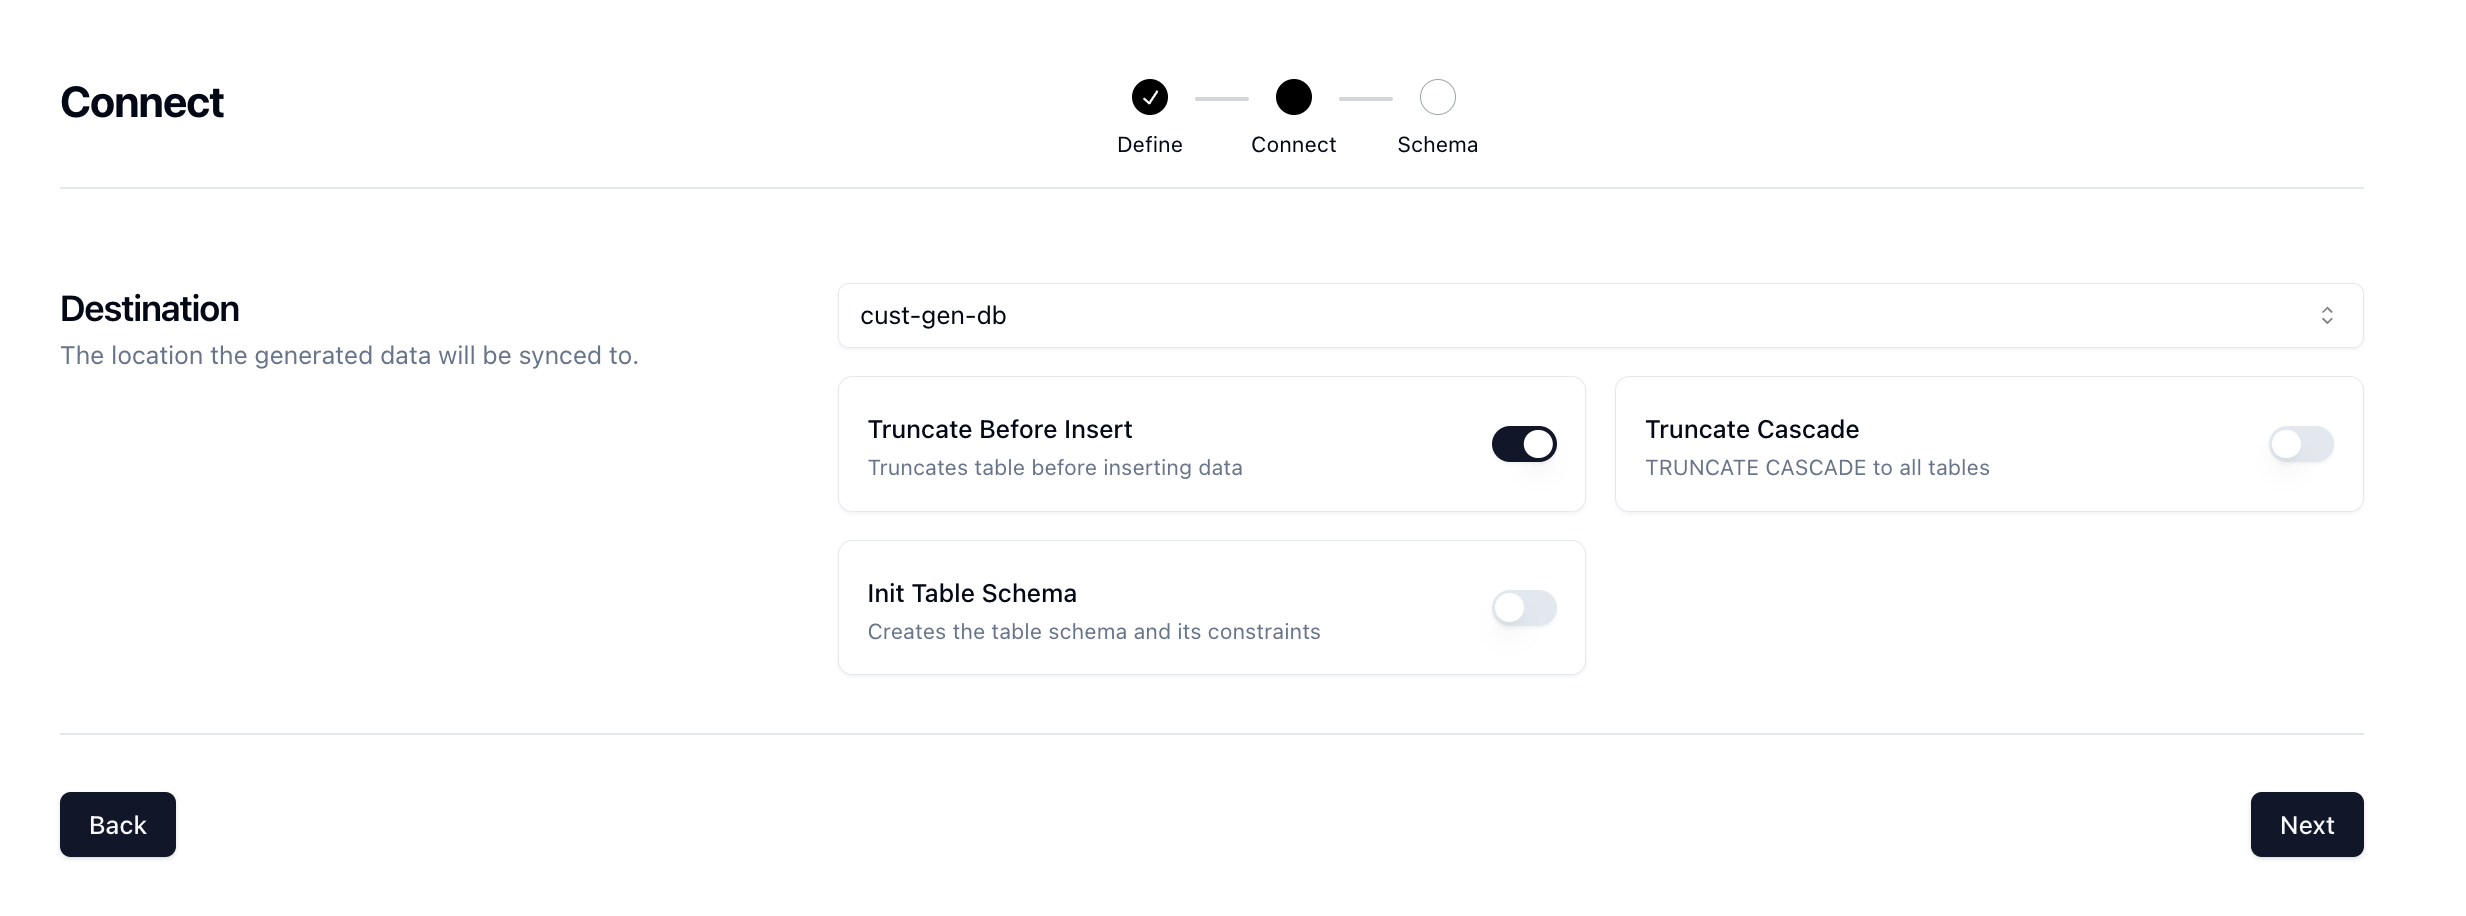
Select the cust-gen-db connection and set the Truncate Before Insert option to true. This will give us a fresh slate every time we want to run the job and clear out any existing data.
Click Next for the last step.
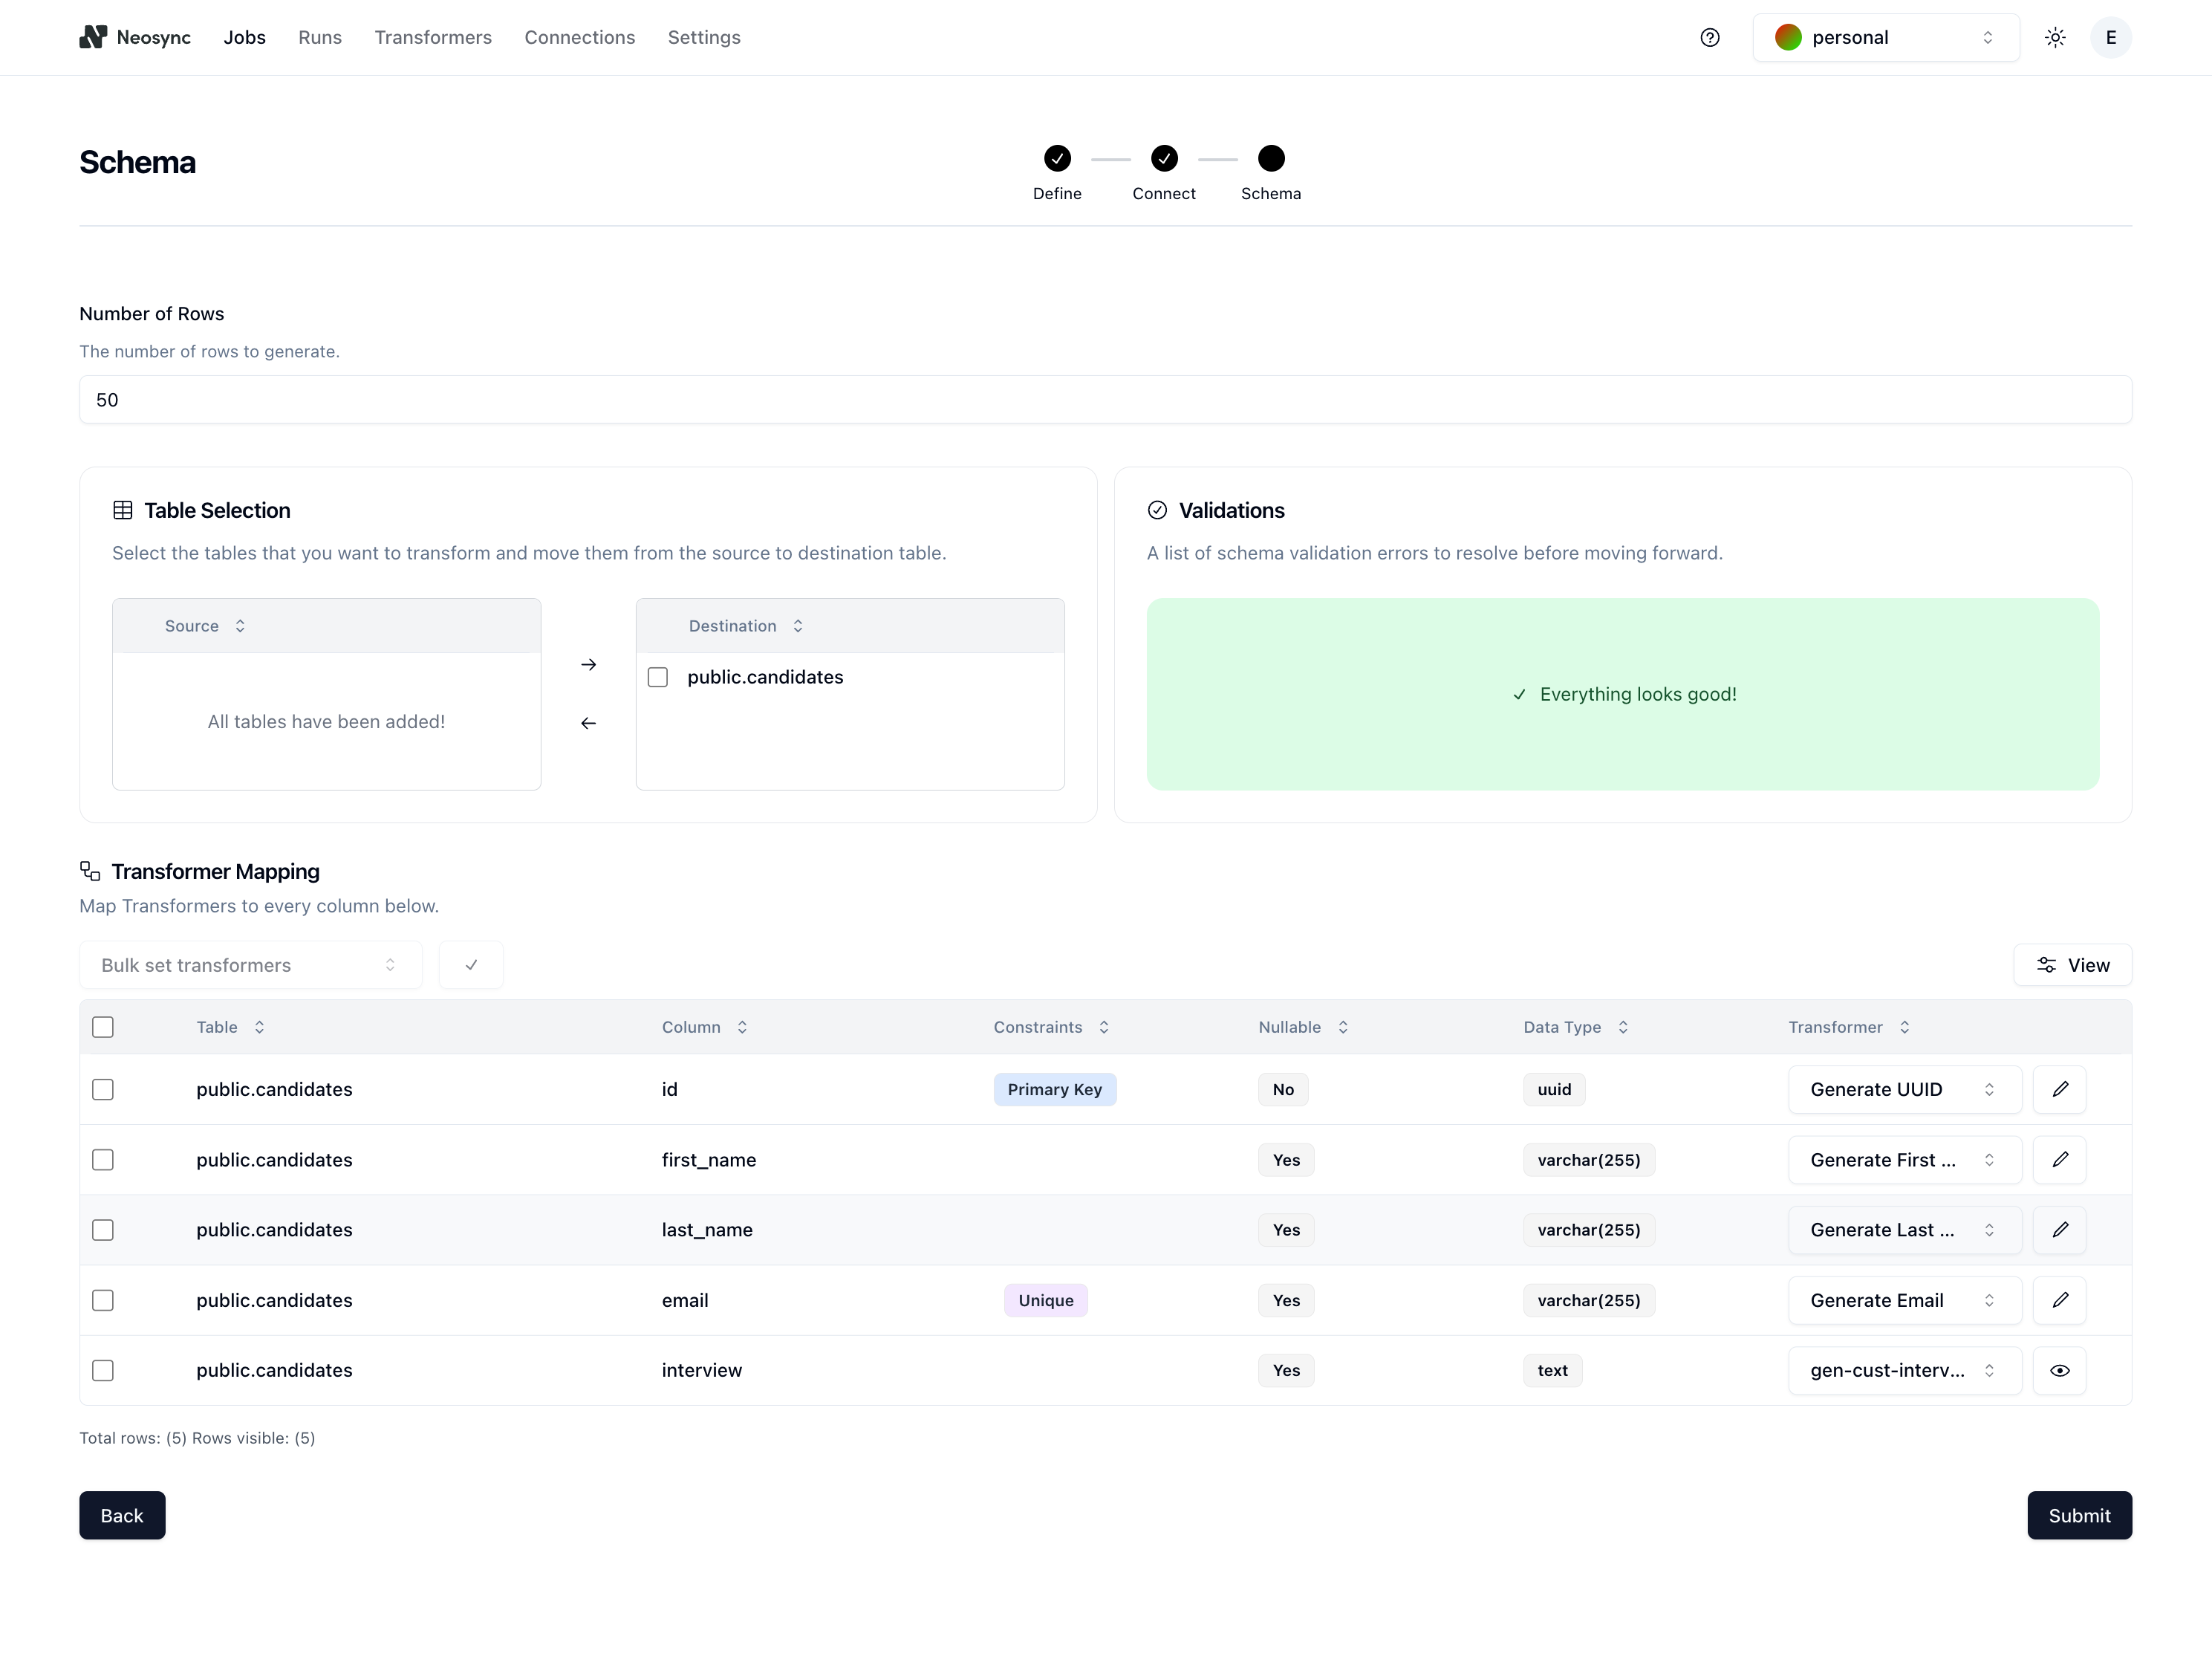
The Schema page is where you configure your schema. Before we configure anything, it should look like this:
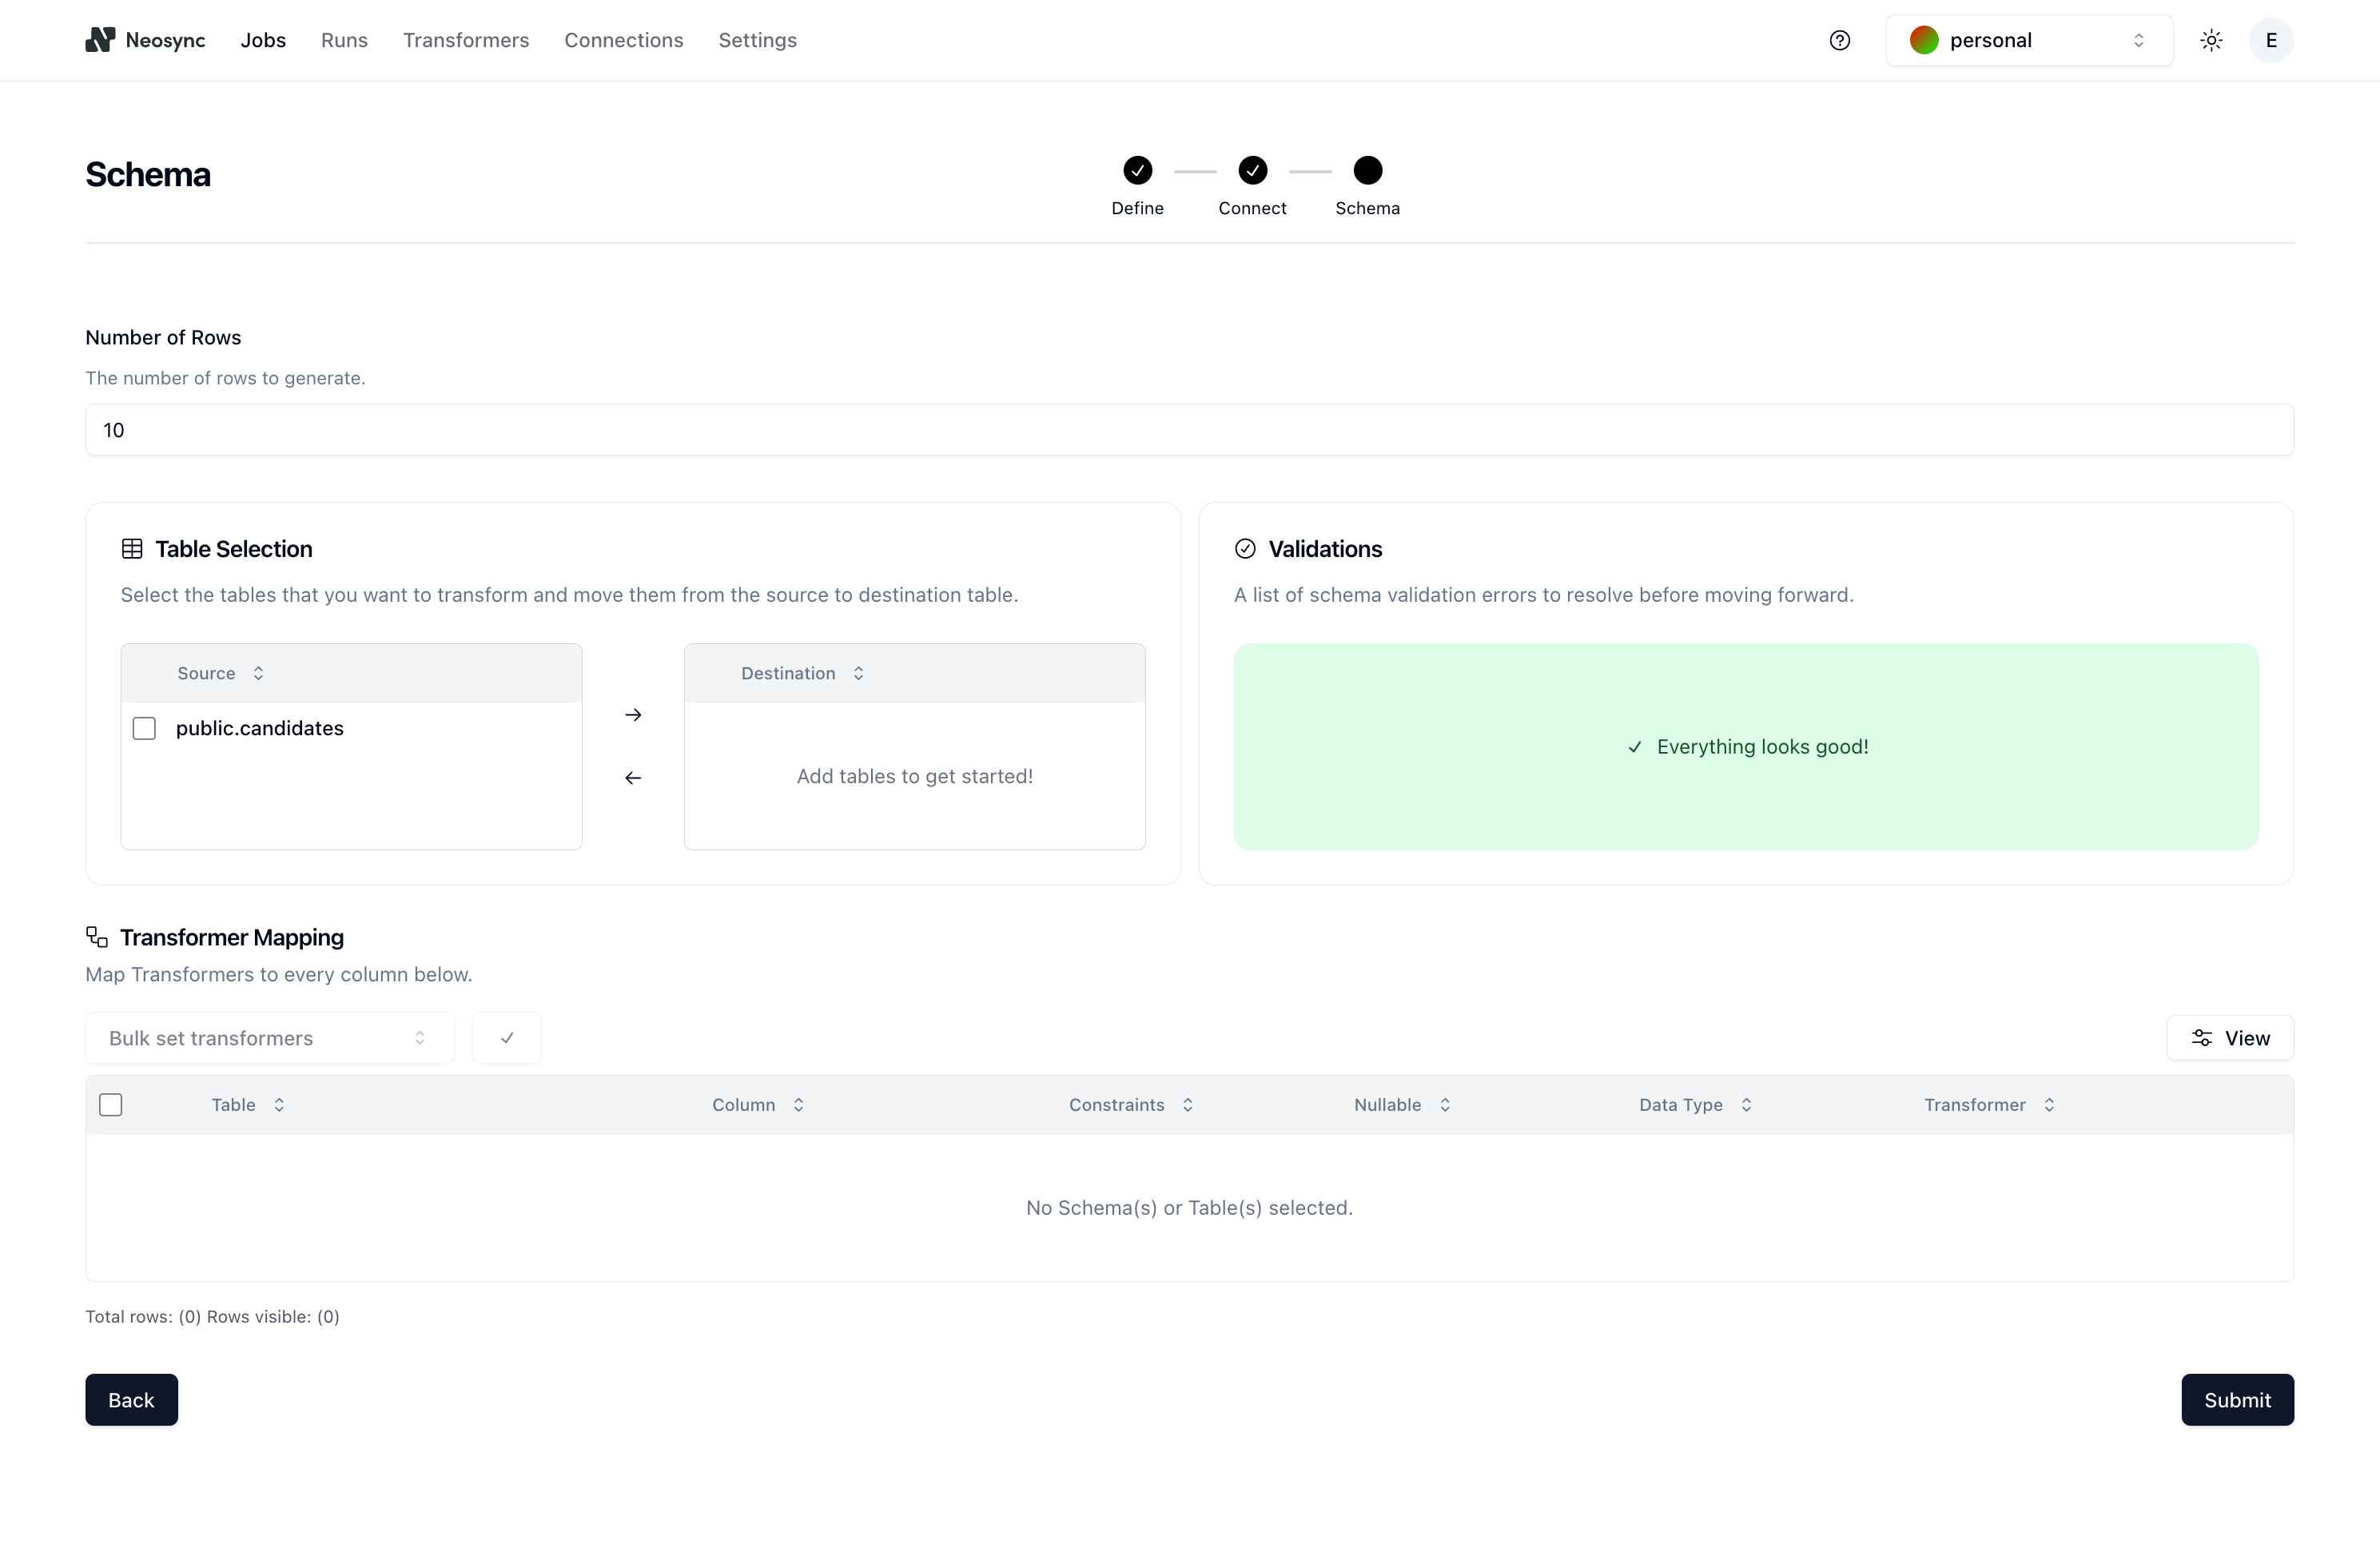
First, let's determine the number of rows we want to create. For this example, let's pick 50, as in 50 customer interviews. Next, click on the checkbox next to the public.candidates table in the Table Selection section and then click on the right arrow button to move it from Source to Destination. If we had multiple tables in our source database, this would allow us to selectively pick which tables we want to work with.
The last step is to map your schema to your transformers. Here is how I mapped my schema:
| Column | Generate Transformer |
|---|---|
| id | Generate UUID |
| first_name | Generate First Name |
| last_name | Generate Last Name |
| Generate Email | |
| interview | gen-cust-interview |
Your final schema page should look like this:
Nice! We're done with all of the setup. Click on Submit to save the job and you'll be routed to the Job Details page and see the job running:

And after a minute or so, the job should complete like this:

Checking the output
Now is the fun part. We can open up our database and see what our data looks like. I'm using DBeaver as a database client to connect to my Neon database but you can also just use the SQL Editor in Neon to query your database.
First, let's check out count and make sure we have the 50 records we wanted. We can do this pretty easily using a small SQL script:
SELECT COUNT(*) FROM public.candidates c
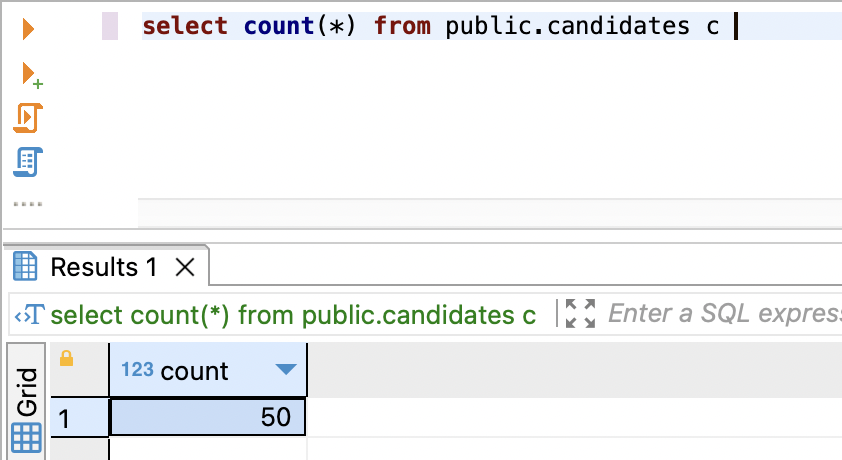
Nice, all 50 records are accounted for.
Next, the data!
SELECT * FROM public.candidates c limit 10
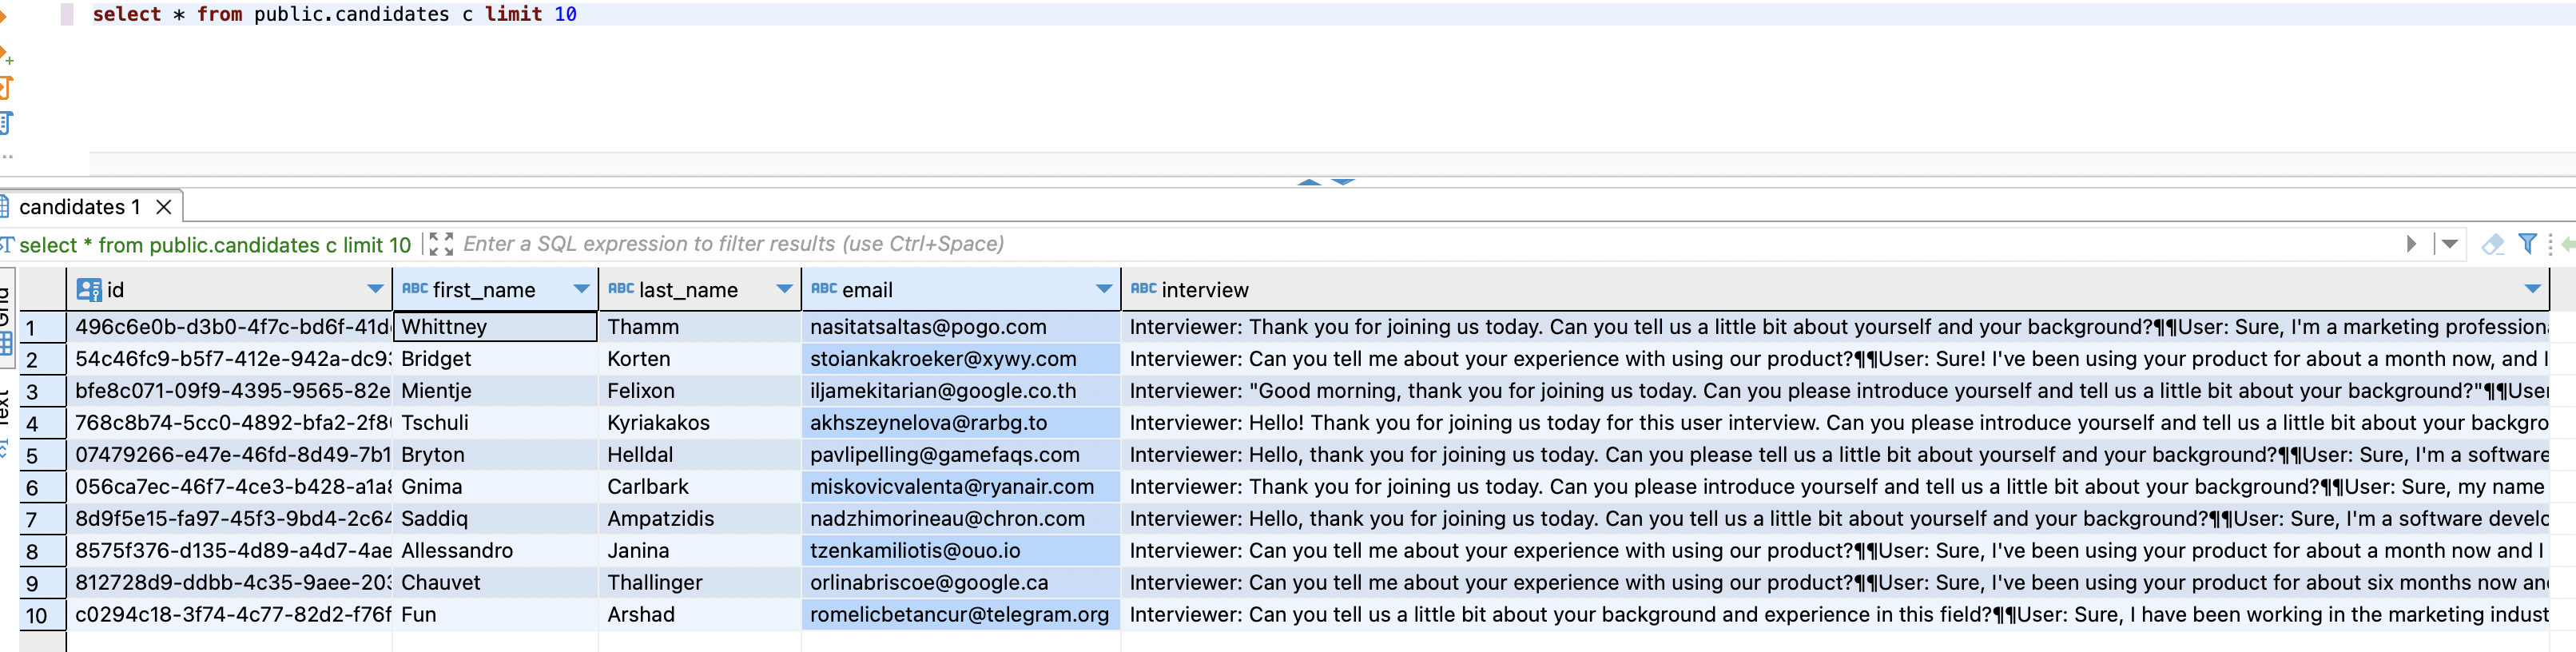
We have our IDs, first names, last names and emails. All looks good so far. Our interview column also looks filled out which is great. Let's take a closer look at one of the transcripts:
Interviewer: Thank you for joining us today. Can you tell us a little bit about yourself and your background?

User: Sure, I'm a marketing professional with over 5 years of experience in the tech industry. I have a strong background in digital marketing, social media management, and content creation.

Interviewer: That's great to hear. What motivated you to pursue a career in marketing?

User: I've always been fascinated by the power of storytelling and how it can influence consumer behavior. Marketing allows me to combine my creativity with strategic thinking to help businesses connect with their target audience.

Interviewer: How do you stay current with the latest trends and developments in the marketing industry?

User: I make sure to attend industry conferences, read marketing blogs, and participate in online courses to stay updated with the latest trends and tools in the industry. I also believe in continuous learning and experimenting to stay ahead of the curve.

Interviewer: That's impressive. Thank you for sharing your insights with us today.
This looks pretty realistic!. Also, we can just do a quick scan and see that the interviews are all different and not a copy and paste which is great.
Conclusion
This is just a peek into what you can do with Neosync and LLMs. You can use any model that you'd like with Neosync as long as it's available at an endpoint.