Connect Private Postgres via Bastion Host
Introduction
Neosync supports connecting a Postgres database that lives within a private VPC/network via a Bastion Host.
We'll go through how to create a Bastion Host on AWS with Terraform, along with how to connect it directly into Neosync.
This guide assumes that you have already created a database in your private network and only covers setting up a Bastion Host and configuring it in Neosync.
What is a Bastion Host?
A bastion host is a special-type of computer in a network that acts as a gateway into the network for a specific purpose. It is typically accessed via SSH and can be a jumping off point to further network access. These servers may also be referred to as a jump box for that reason.
Bastion Hosts are typically very minimal installations and are highly secured and hardened. This is because they effectively act as a gateway to your private network that is intentionally kept off of the public internet.
It's important for Bastion Hosts to have good logging and monitoring, as well as have strict isolation and access control.
Why do we need one for Neosync?
Databases are typically one of the most locked down and secured pieces of running software within a network. They for the most part are not publicly accessible to the internet. Therefore, Neosync Cloud will be unable to communicate with your database without the ability to tunnel into your private network in some capacity.
AWS Bastion Host Setup
This next section will showcase how to set up a Bastion Host via Terraform on AWS. If you're not using either of those technologies, you'll need to google around to figure out how to set up a server.
Creating a SSH key for use with Neosync
You may generate a SSH key in any way that is comfortable to you. Neosync does not require any specific algorithm, but a few different options are detailed below.
ED25519
$ ssh-keygen -t ed25519
RSA
$ ssh-keygen -t rsa -b 4096
It's up to you if you'd like to attach a password to this key.
If that is desirable, run the command with -C "youremail@example.com and the system should prompt a password. To be sure, -N "" may also be provided.
Afterwards, you'll have two new files in your ~/.ssh folder, the public and private key.
We'll need both of these at various points throughout the rest of this guide.
Terraform Module
There is a great terraform module available on the public registry Guimove/bastion/aws. This module is designed to create a secure SSH bastion on AWS, and it also comes with auditing and logging out of the gate!
Here is an example of a minimal install, and is not dissimilar from a setup we use internal at Neosync.
The example below already contains the NeosyncCloud IP Addresses that can be used to isolate the Bastion Host to only be accessed via NeosyncCloud servers. This is generally very important for security and compliance as you don't want a bastion host accessible over the general internet.
Those IP Addresses are as follows:
54.69.79.83
44.235.108.235
35.84.248.98
The code below also sets up the Bastion host to only allow ingress from NeosyncCloud on port 22, and egress may only be port 5432 directly to the subnets that the database live in. This is just a default example and may need to be changed to facilitate a real setup.
Note the variable ssh_users, this is where you assign the user and associate it with the public key we created earlier. This will be used by Neosync to tunnel through this host to gain access to the database.
The username can be named whatever you want, but neosync could be a good choice.
To quickly copy the SSH key, if your file was named id_ed25519:
$ cat ~/.ssh/id_ed25519.pub | pbcopy
The terraform code itself:
variable "bastion_bucket_name" {
  type = string
}
variable "aws_region" {
  type = string
}
variable "vpc_id" {
  type = string
}
variable "elb_subnets" {
  type = list(string)
  description = "subnets that load balancer will live in"
}
variable "auto_scaling_group_subnets" {
  type = list(string)
  description = "subnets that the autoscaling EC2 instances will live in"
}
variable "ssh_users" {
  type = map(any)
  description = "Map of name and SSH public key. ex: {nick : "ssh-ed25519 <key>"}
}

module "bastion" {
  source  = "Guimove/bastion/aws"
  version = "3.0.6"

  bucket_name = var.bastion_bucket_name

  region        = var.aws_region
  vpc_id        = var.vpc_id
  is_lb_private = false

  create_dns_record = false

  use_imds_v2 = true

  elb_subnets                = var.elb_subnets
  auto_scaling_group_subnets = var.auto_scaling_group_subnets

  instance_type = "t3.nano"

  public_ssh_port = 22

  bastion_security_group_id = aws_security_group.bastion_host_security_group.id
}

resource "aws_s3_object" "ssh" {
  for_each   = var.ssh_users
  bucket     = module.bastion.bucket_name
  kms_key_id = module.bastion.bucket_kms_key_arn

  key     = "/public-keys/${each.key}.pub"
  content = each.value
}

resource "aws_security_group" "bastion_host_security_group" {
  description = "basic security group for bastion host"
  name        = "bastion-host-sg"
  vpc_id      = var.vpc_id
}

resource "aws_security_group_rule" "ingress_bastion" {
  description = "Incoming traffic to bastion"
  type        = "ingress"
  from_port   = 22
  to_port     = 22
  protocol    = "TCP"
  cidr_blocks = [
    "54.69.79.83",
    "44.235.108.235",
    "35.84.248.98",
  ]
  ipv6_cidr_blocks = []

  security_group_id = aws_security_group.bastion_host_security_group.id
}

resource "aws_security_group_rule" "egress_postgres" {
  description = "Allow connections to Postgres"
  type        = "egress"
  from_port   = "5432"
  to_port     = "5432"
  protocol    = "tcp"
  cidr_blocks = var.auto_scaling_group_subnets # can be more specific here if your database is in a separate subnet from this server

  security_group_id = aws_security_group.bastion_host_security_group.id
}
Configuring Neosync to use the Bastion Host
I'm going to use a personal account in links going forward, which may need to change if you're configuring this for a team account.
Navigate to Create a new Postgres Connection. Otherwise, go to Neosync Cloud, navigate to Connections -> New Connection -> Postgres.
Set a connection name and drop in your database url.
Open the Bastion Host Configuration Section.
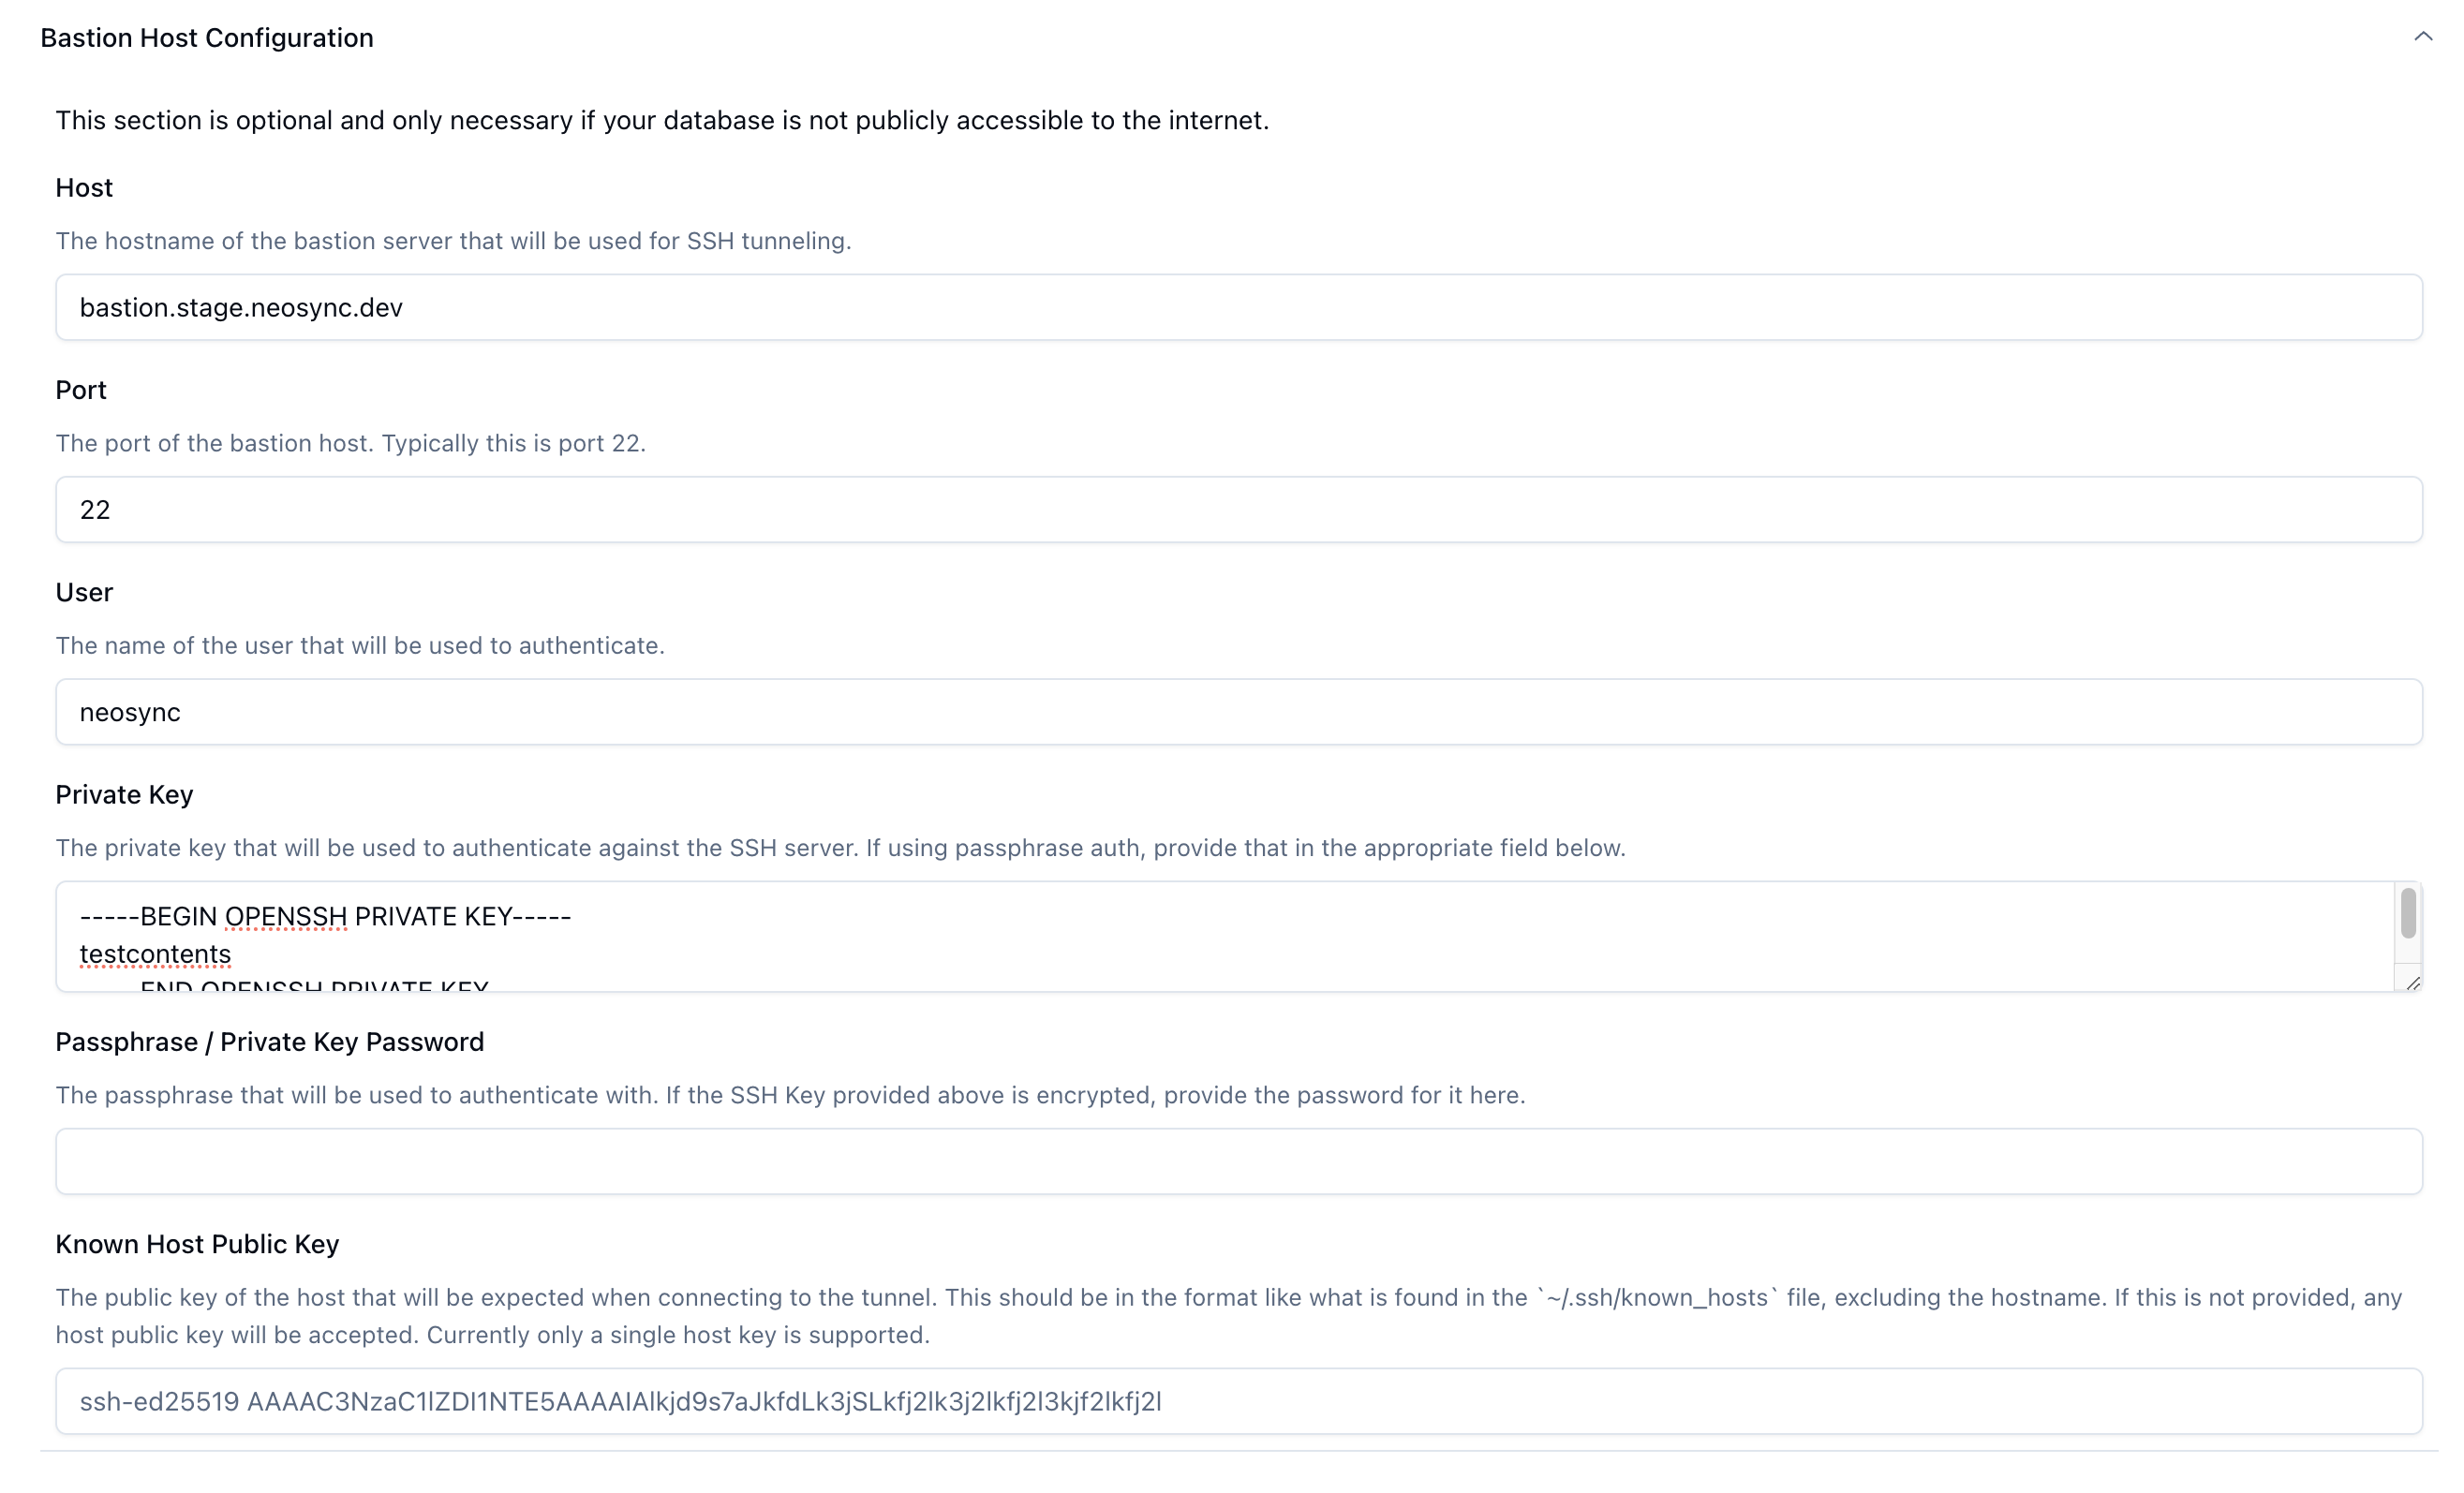
This is where you'll drop in the host configuration that we created above.
The host will be the load balancer url that was created above, port 22, the "neosync" ssh user, the private key along with the optional key password. You can also connect the known host public key to be even more explicit about security.
Once all of that has been configured, click Test connection to try it out!
Conclusion
You should now be able to have Neosync communicate directly with your database in an internal VPC/network, and doing so in a very secure manner!