Syncing data with MongoDB
Introduction
In this guide we will walk through how to create a sync job to sync data across two MongoDB databases. Sync jobs are used to sync data between a source and one or many destinations.
Typically this is used to anonymize and sync production data to lower level environments.
Some notes:
- Currently MongoDB syncs everything. Meaning anything that is not explicitly mapped will be set to passthrough and transferred to the destination. If you don't want this, create a mapping for the fields you don't want to passthrough.
- You cannot currently sync data between two databases hosted on the same MongoDB instance
Setting up Connections
For this example, I'm going to set up two Connections to two MongoDB databases hosted on two different instances.
Setting up the Source Connection
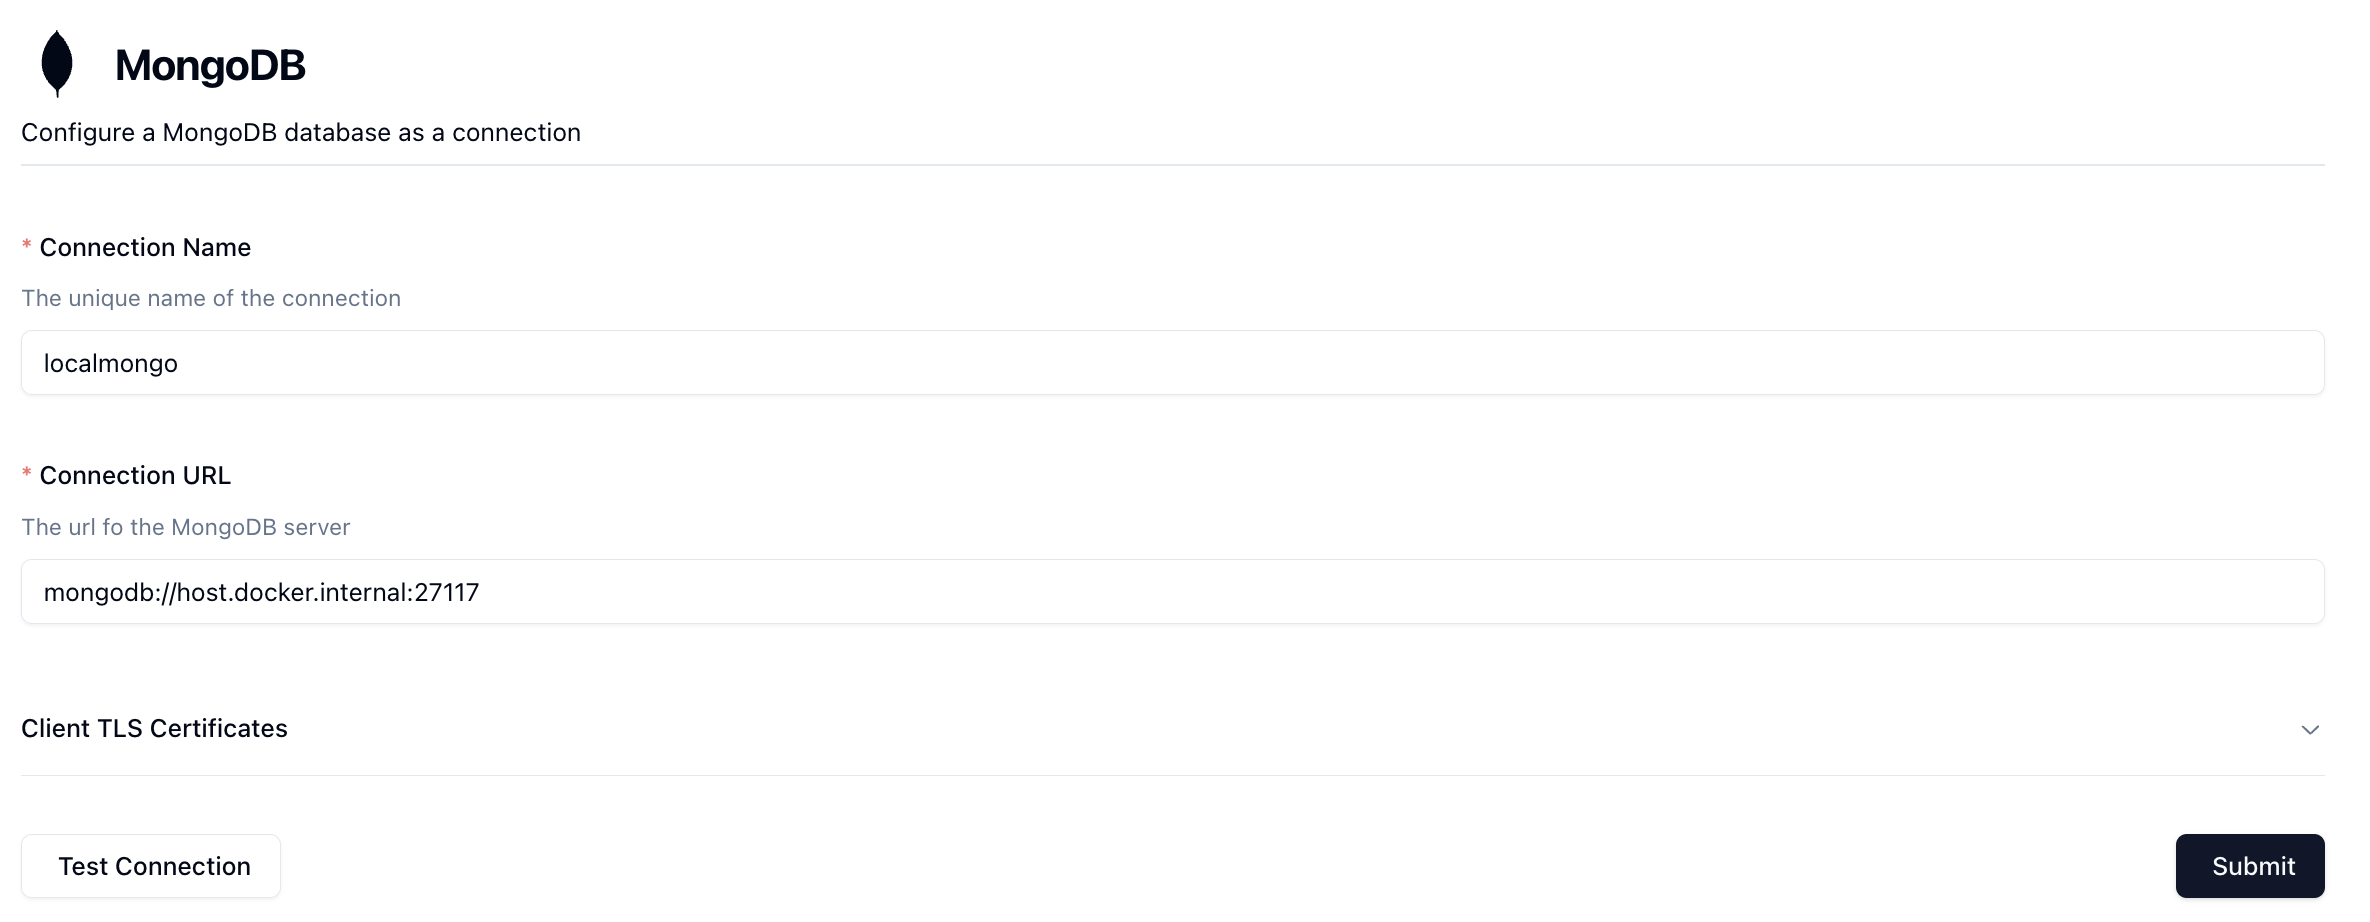
To create a new connection, go to Connections -> + New Connection -> MongoDB.
Then fill out the form fields:
- Connection Name: Enter a unique name for this connection that you'll easily recognize. This is just a label and does not affect the connection itself.
- URL: Enter your database connection url that will be used to connect to Mongo. Neosync supports both
mongodbandmongodb+srvprotocols.
In the image above, I've connected to my local MongoDB instance using the mongodb://host.docker.internal:27117 connection string. For a hosted instance of MongoDB, you'll want to use the connection string provided to you by MongoDB. You can also configure TLS here as well.
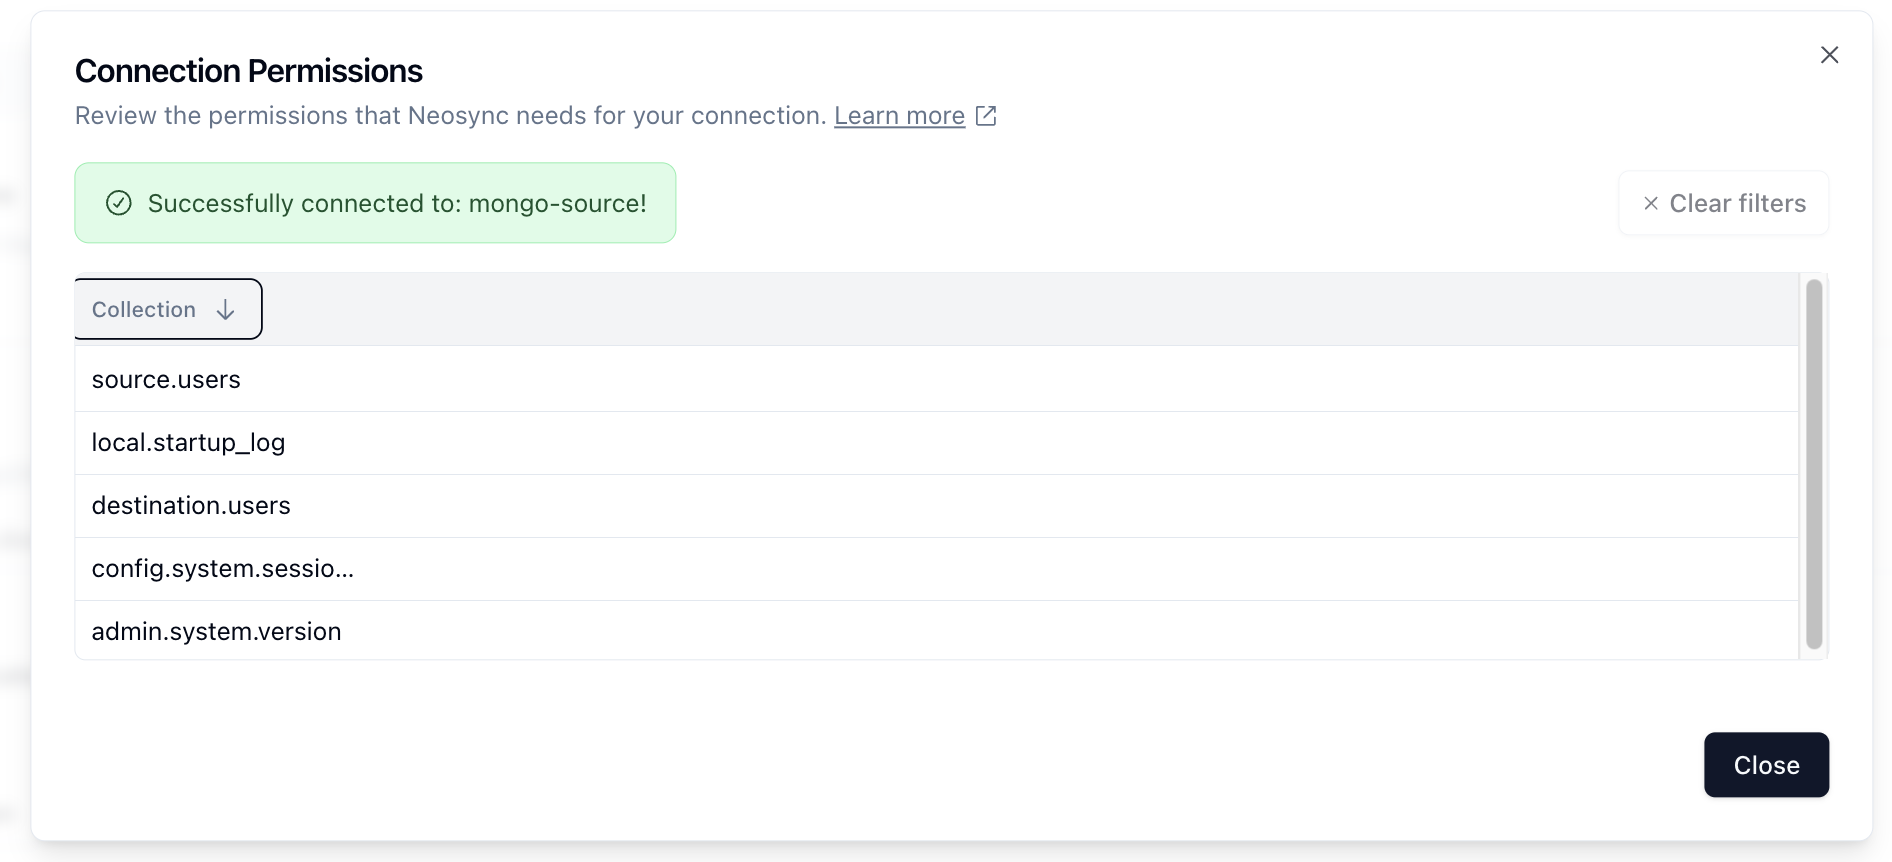
Once you've configured your Connection, you can test to make sure that it works by pressing the Test Connection button. If Neosync is able to connect to it, then you should see something like:
Save your Connection by clicking Submit and you're good to go!
Setting up the Destination Connection
Follow the steps from the section above and just substitute the Connection URL for the one from your destination instance.
Creating a Job
Now that your Connections have been set up, let's create a job.
Go to Jobs -> + New Job -> Data Synchronization.
Then give your job a name and a schedule if you'd like to run it on a schedule.
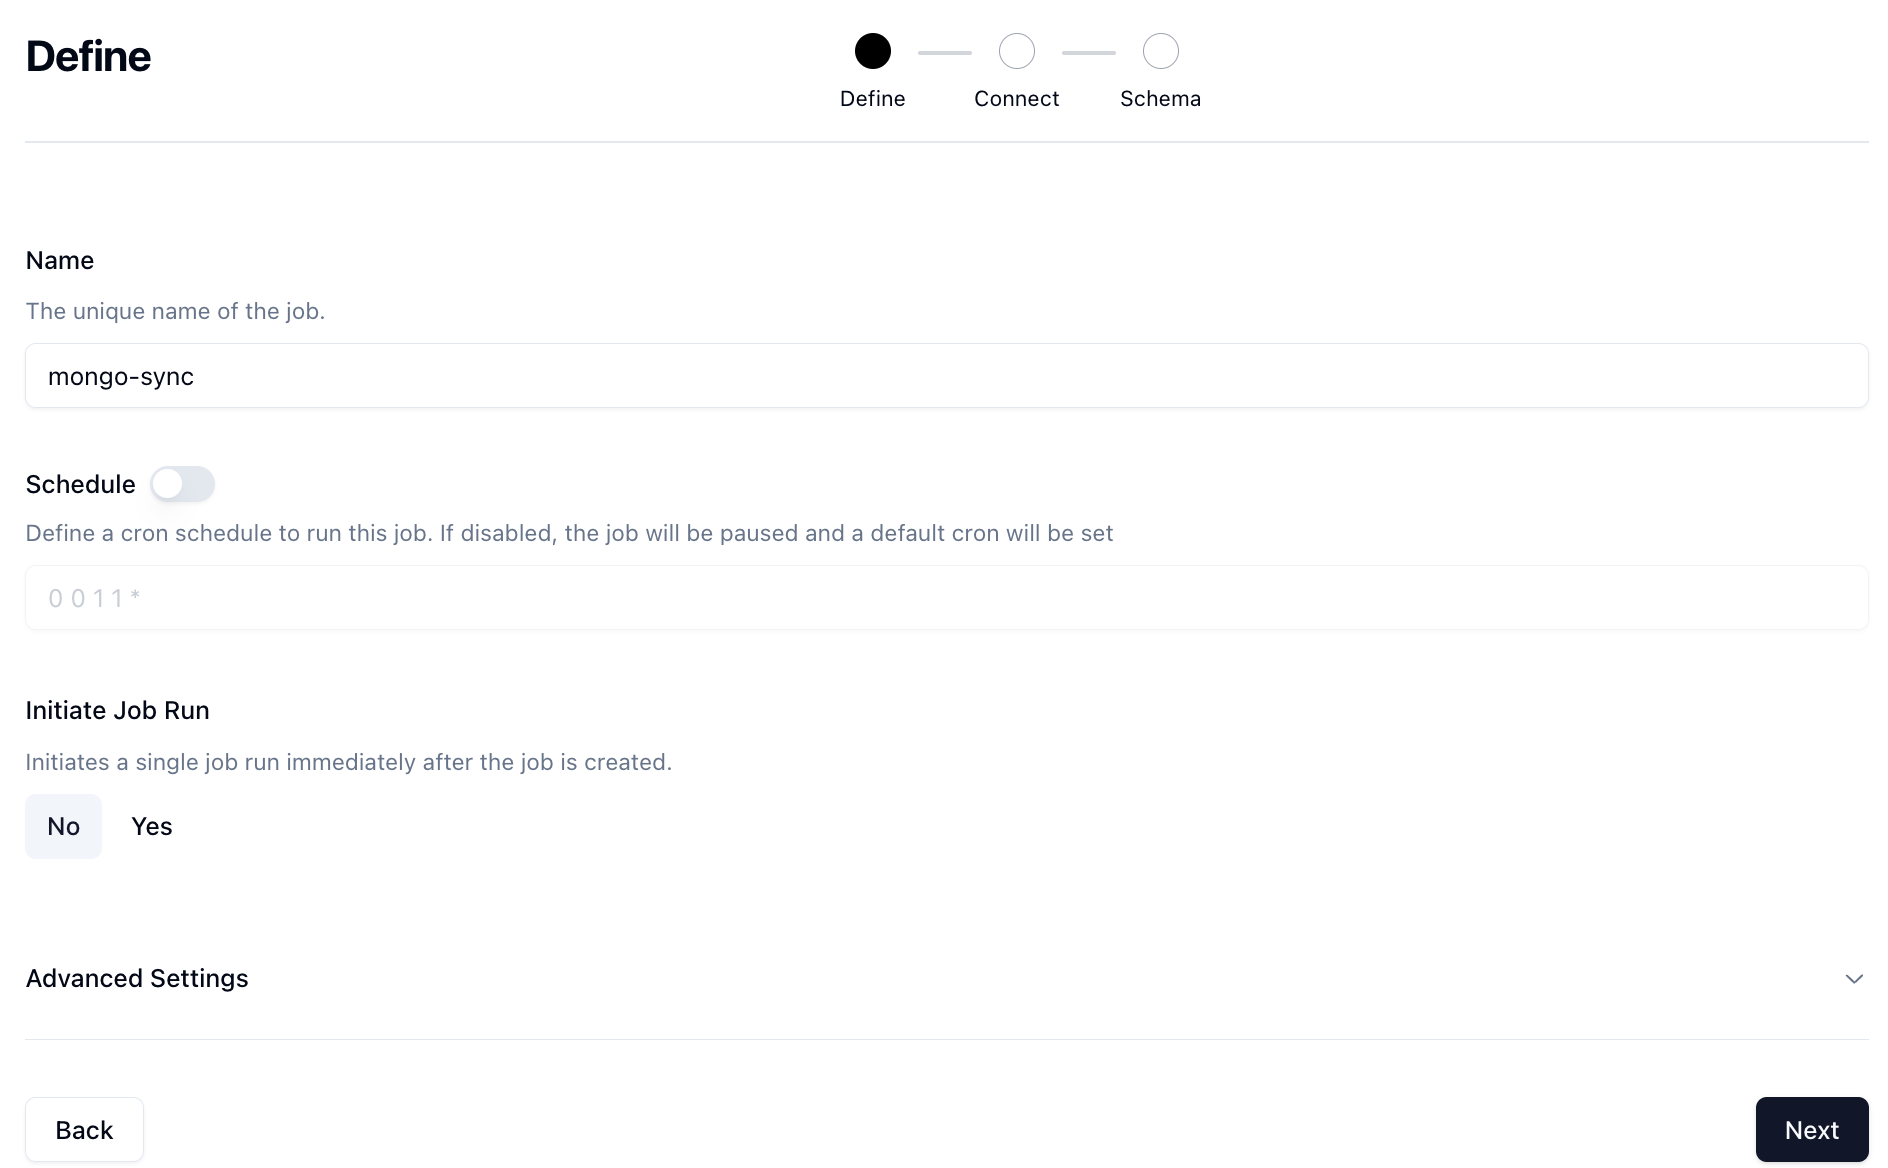
click Next.
Then in the Source section, select the source and destination Connections you previously created.
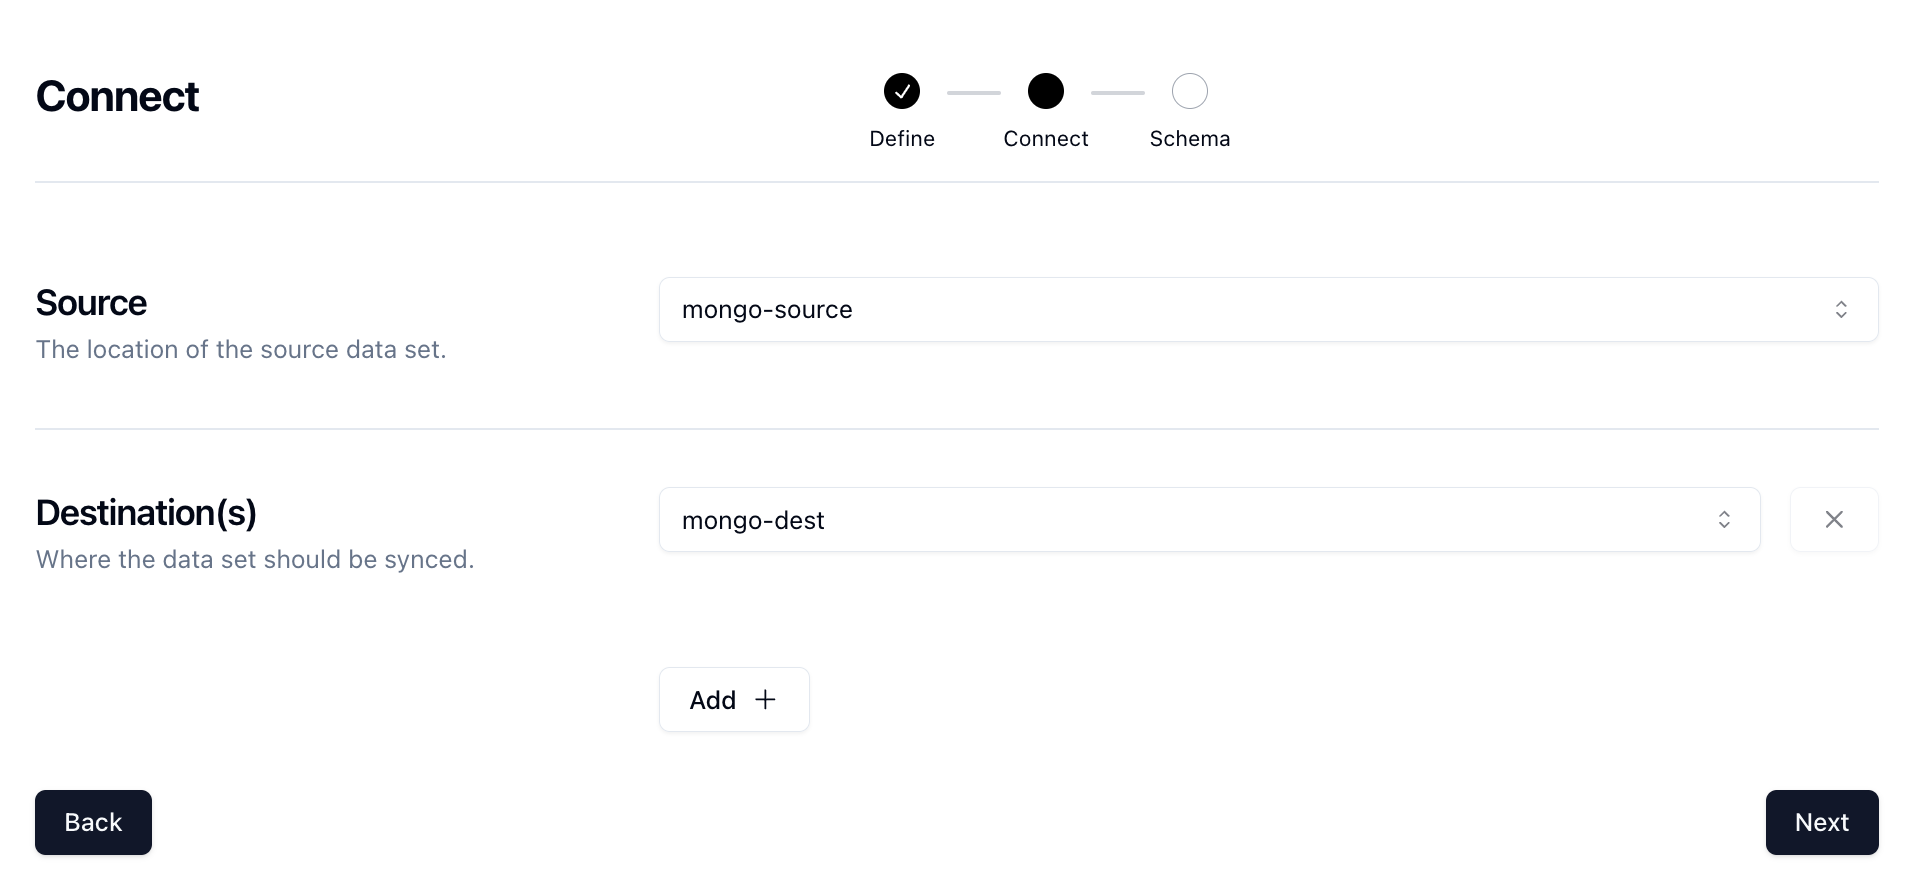
Click Next to get to the mapping section.
Adding mappings
Mappings are added one-by-one and start with the collection. Select the Collection from the drop down menu that you want to map.

Then in the Document Key field, use dot notation to navigate to the key that you want to map. For example, our source Connection has this object:
{
    firstName: "John",
lastName: "Doe",
email: "john.doe@example.com",
password: "password123",
age: 30,
address: {
    street: "123 Main St",
    city: "Hometown",
    state: "CA",
    zipCode: "90210"
    },
phoneNumbers: [ "+1-555-123-4567", "+1-555-987-6543"],
createdAt: new Date(),
updatedAt: new Date()
}
If we wanted to anonymize the email field then our dot notation would simply be: email. However, if we wanted to transform the state field, then our dot notation would be: address.state
Once we've set our Document Key, then we can select the Transformer we want to set for that Document Key. For example, to generate a new email address, it would look like this:
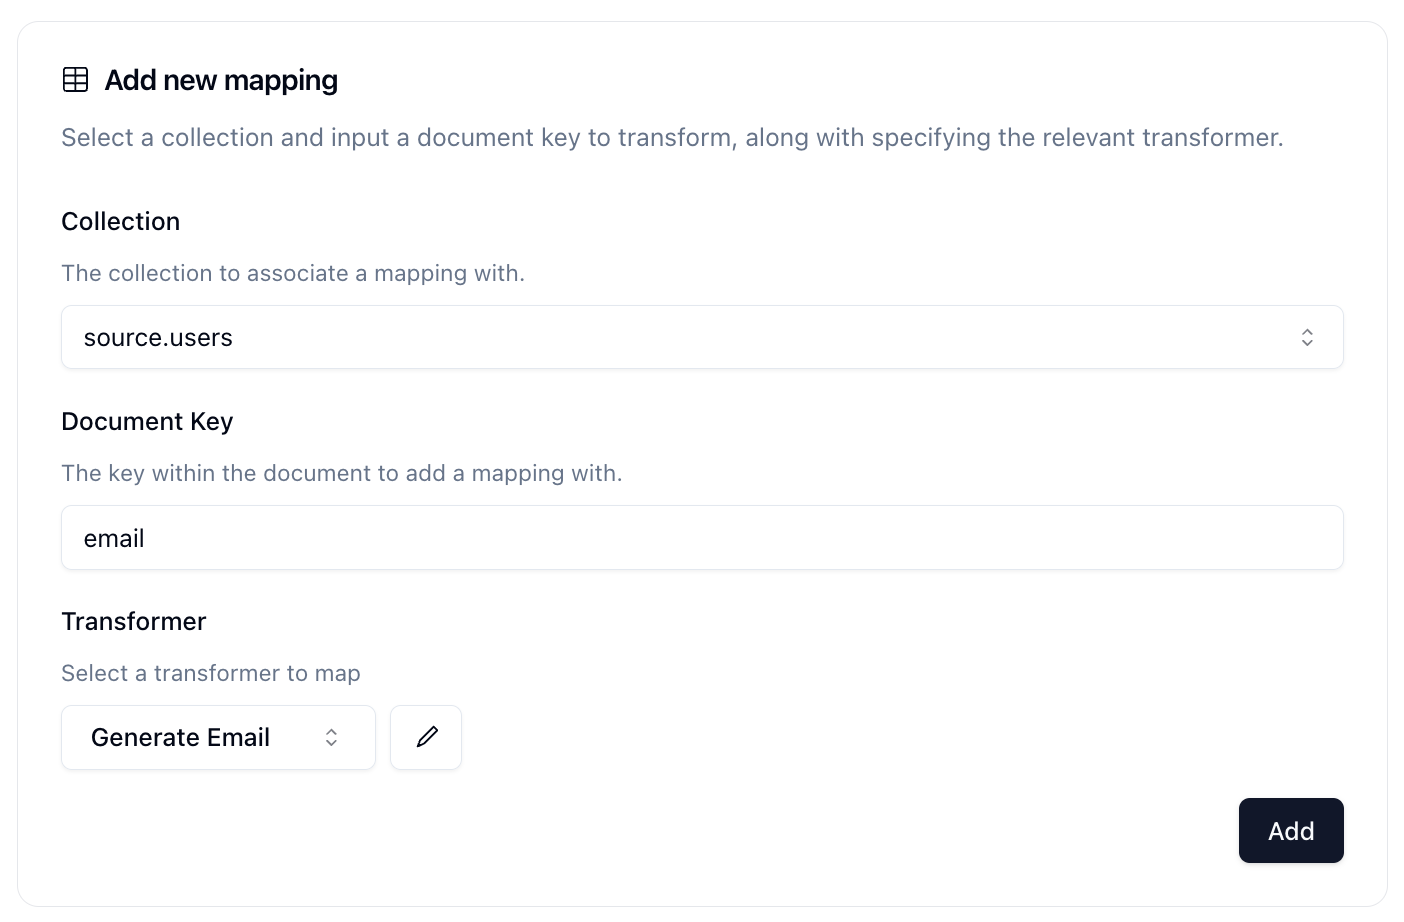
Go through your collection schema and map the Document Keys that you'd like to transform and click Add to add it to the Transformer Mapping section below.
Our two examples above, email and state will produce a Transformer Mapping table like so:

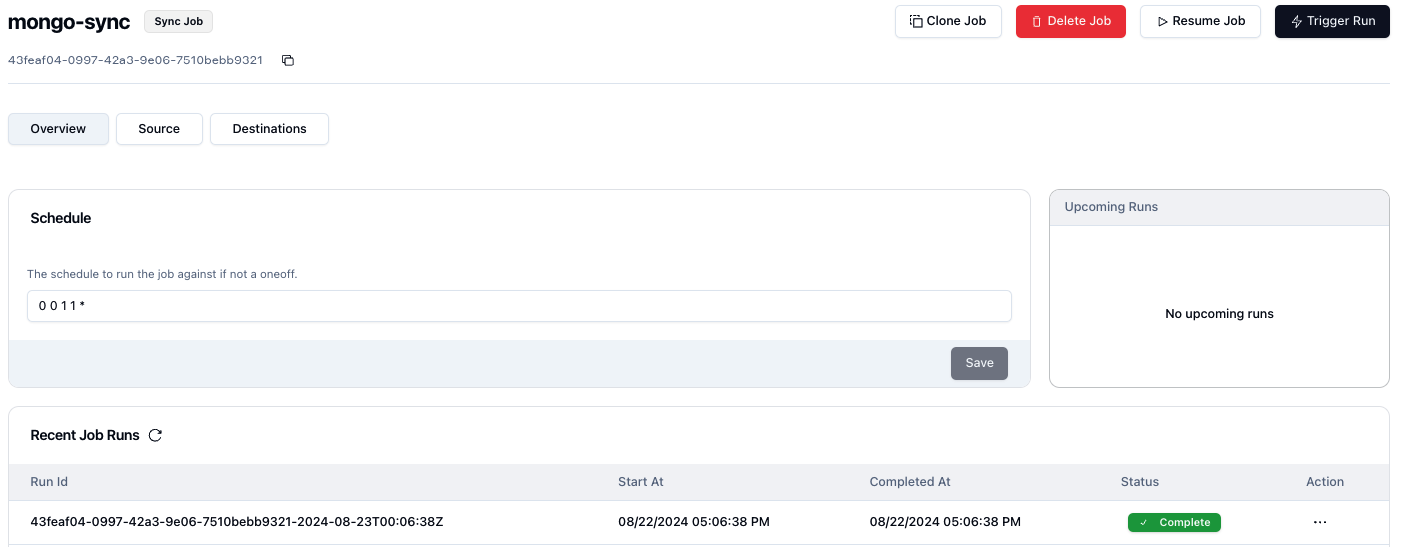
Once you're happy with the mappings, click Submit to create the job. You'll then be taken to the Job page.
Here you can click on Trigger Run to execute the sync.
Once complete, you'll see the status update:
Congrats! You've run a data sync job with MongoDB!